Mastering Gamma Adjustment in PhenoCapture AI
Gamma adjustment is a powerful tool for correcting the overall exposure of your images. Unlike simple brightness changes that affect all pixels equally, gamma correction intelligently adjusts the midtones while preserving the absolute blacks and whites. PhenoCapture AI makes this advanced adjustment incredibly fast and intuitive.
With its highly optimized real-time parallel processing engine, you can instantly see your gamma tweaks without any frustrating lag, ensuring perfectly balanced tones every time.
💡 Key Features
- Precise Tonal Control: Smoothly adjust the gamma value from 0.01 to 10.00 using the intuitive slider or exact numeric input for pinpoint accuracy.
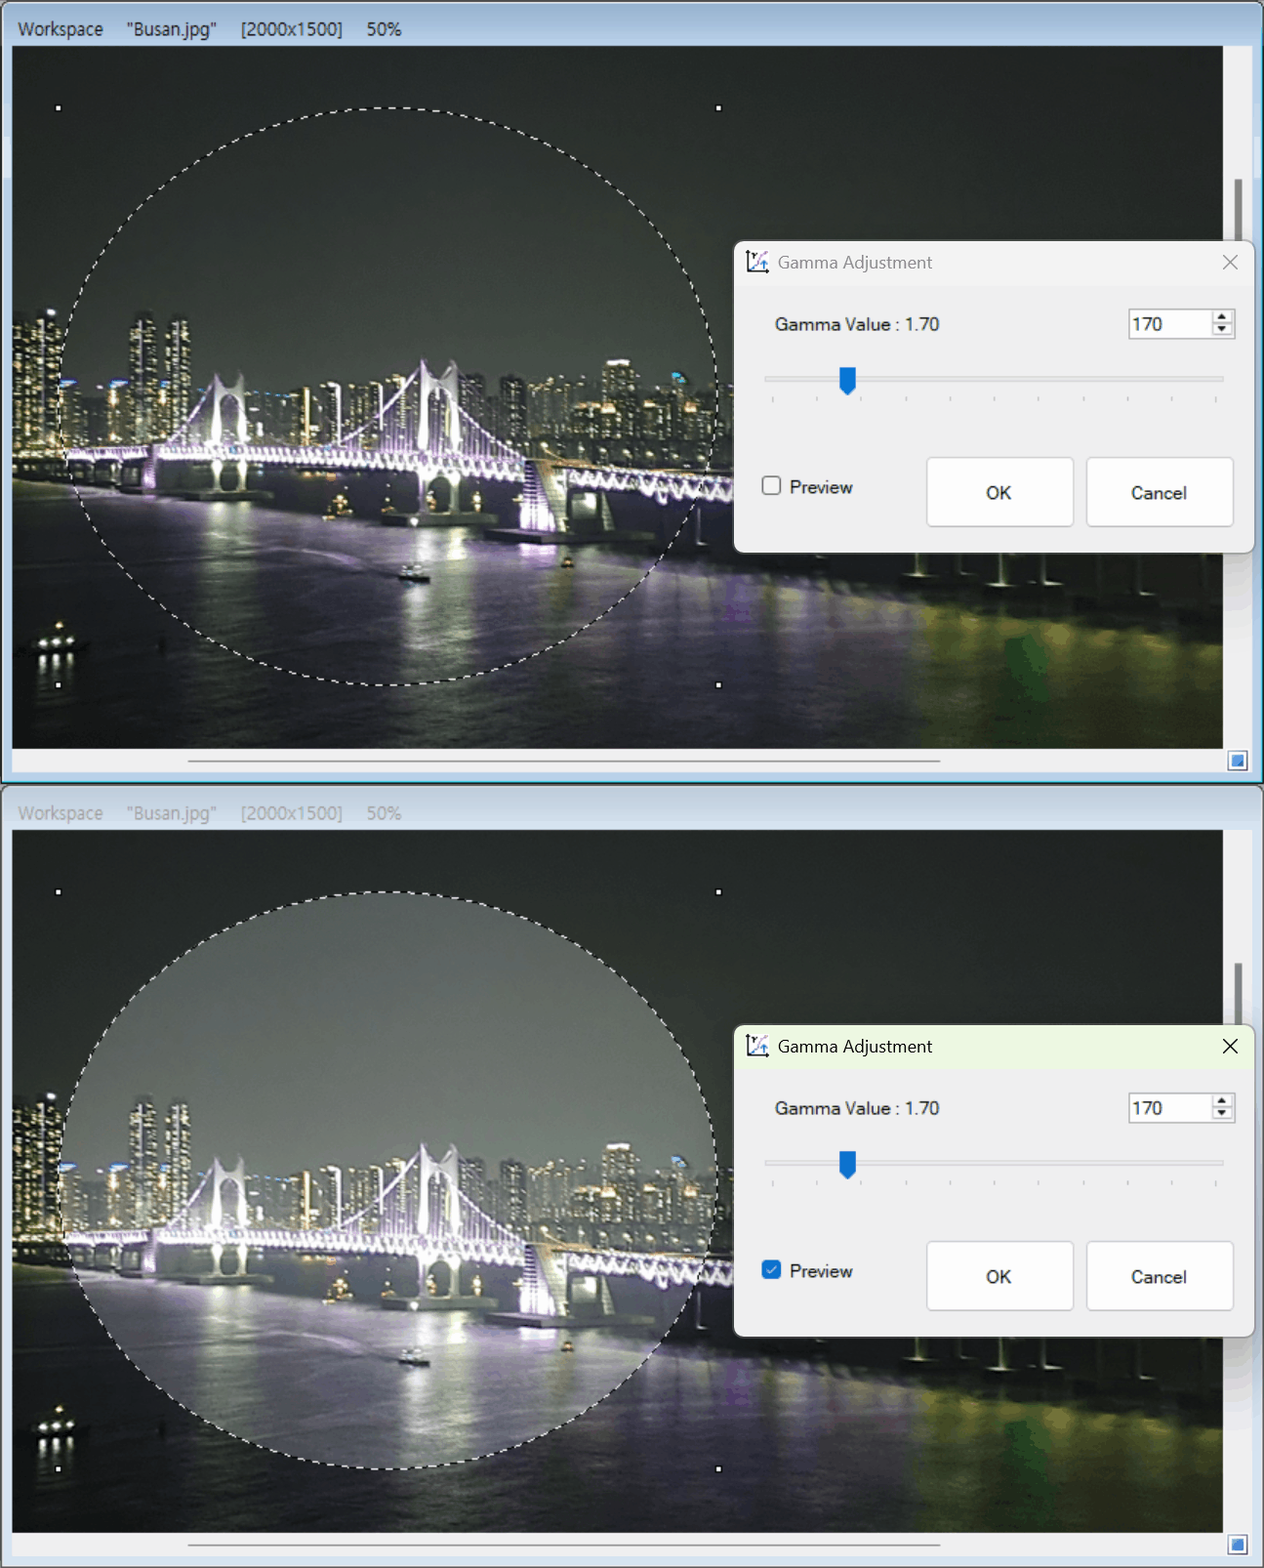
- Ultra-Fast Real-Time Preview: PhenoCapture AI features an advanced, lag-free preview engine powered by parallel processing. As you move the slider, the changes appear on your image instantly. The preview stays perfectly synced even if you are zoomed in or working within a specific selected area (marching ants).
- Selective Adjustments: You do not have to edit the entire image. If you only want to correct a specific part of your photo, simply make a selection first. The gamma correction will only apply inside that specific boundary.
- One-Click Reset: Experiment freely! If you change your mind, a single click on the cancel button instantly reverts your image to its original state.
🛠️ How to Adjust Gamma
Improving your midtones takes only a few seconds:
Step 1: Enable the Live Preview
Open the Gamma tool. Before making any changes, make sure the Preview checkbox is ticked. This allows you to see the effects of your tonal adjustments directly on your workspace in real-time.
Step 2: Adjust the Gamma Value
Use the Gamma slider or the numeric input box to fine-tune the exact gamma level.
- Move the slider to the left (values below 1.00) to darken the midtones, which is excellent for adding depth and contrast to washed-out or overexposed images.
- Move the slider to the right (values above 1.00) to brighten the midtones, helping to reveal hidden details in dark shadows without blowing out the highlights.
Step 3: Apply Your Adjustments
Because the live preview updates instantly, you will know exactly what the final result will look like as you drag the slider. Once you are completely satisfied with the visual balance, simply click the [OK] button to apply the changes to your image.
By simply adjusting the gamma value, you can dramatically improve the depth, exposure, and overall quality of any image, photo, or scanned document!