🎯 Mastering Region Selection: Shapes, Shortcuts, and Masks
Precise region selection is the foundation of effective image analysis. PhenoCapture AI’s Region Selection Tool provides a highly flexible and intuitive workflow, allowing you to define exact areas of interest using a variety of shapes, keyboard modifiers, advanced edge-detection, and binary mask conversions.
Here is a complete guide to mastering the selection tools in your workspace.
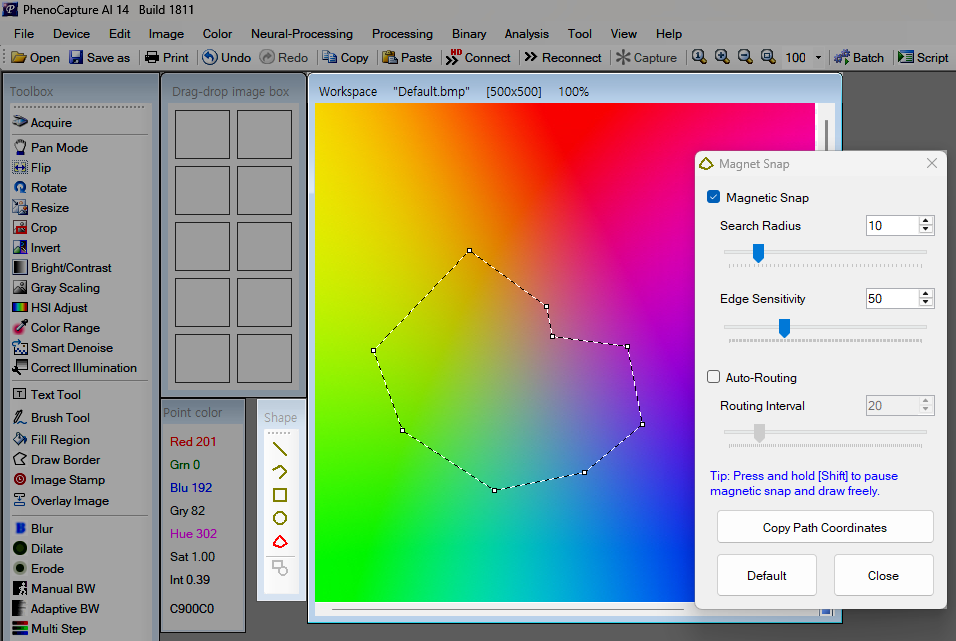
🧰 Available Selection Shapes
The Select Toolbox offers a variety of shapes to fit any target object. You can choose from the following tools:
- Rectangle: Standard rectangular bounding box.
- Circle (Oval): Elliptical selection tool.
- Polygon: Draw complex shapes point-by-point. (Supports Magnetic Snap)
- Path (Freehand): Trace custom shapes smoothly along contours. (Supports Magnetic Snap)
- Line: Measure or select across straight vectors.
⌨️ Advanced Keyboard Shortcuts (Modifier Keys)
You can dramatically speed up your workflow by combining your mouse actions with keyboard modifiers. PhenoCapture AI’s selection engine supports compound shapes and locked proportions.
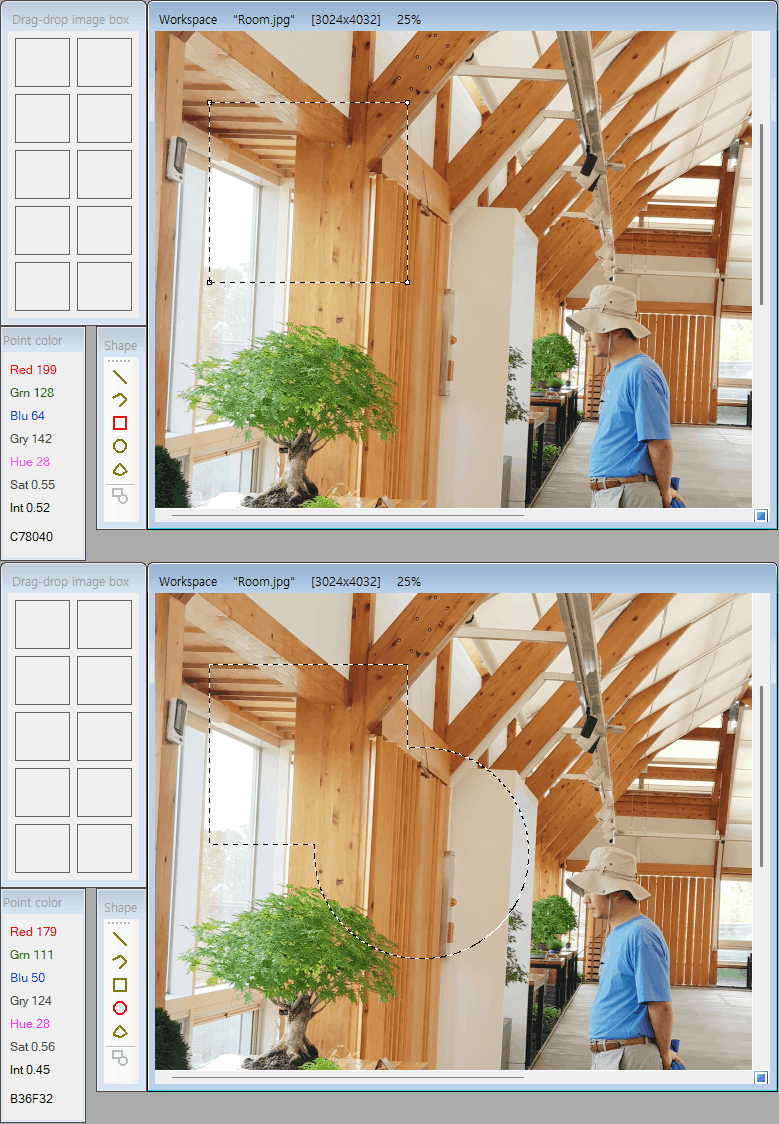
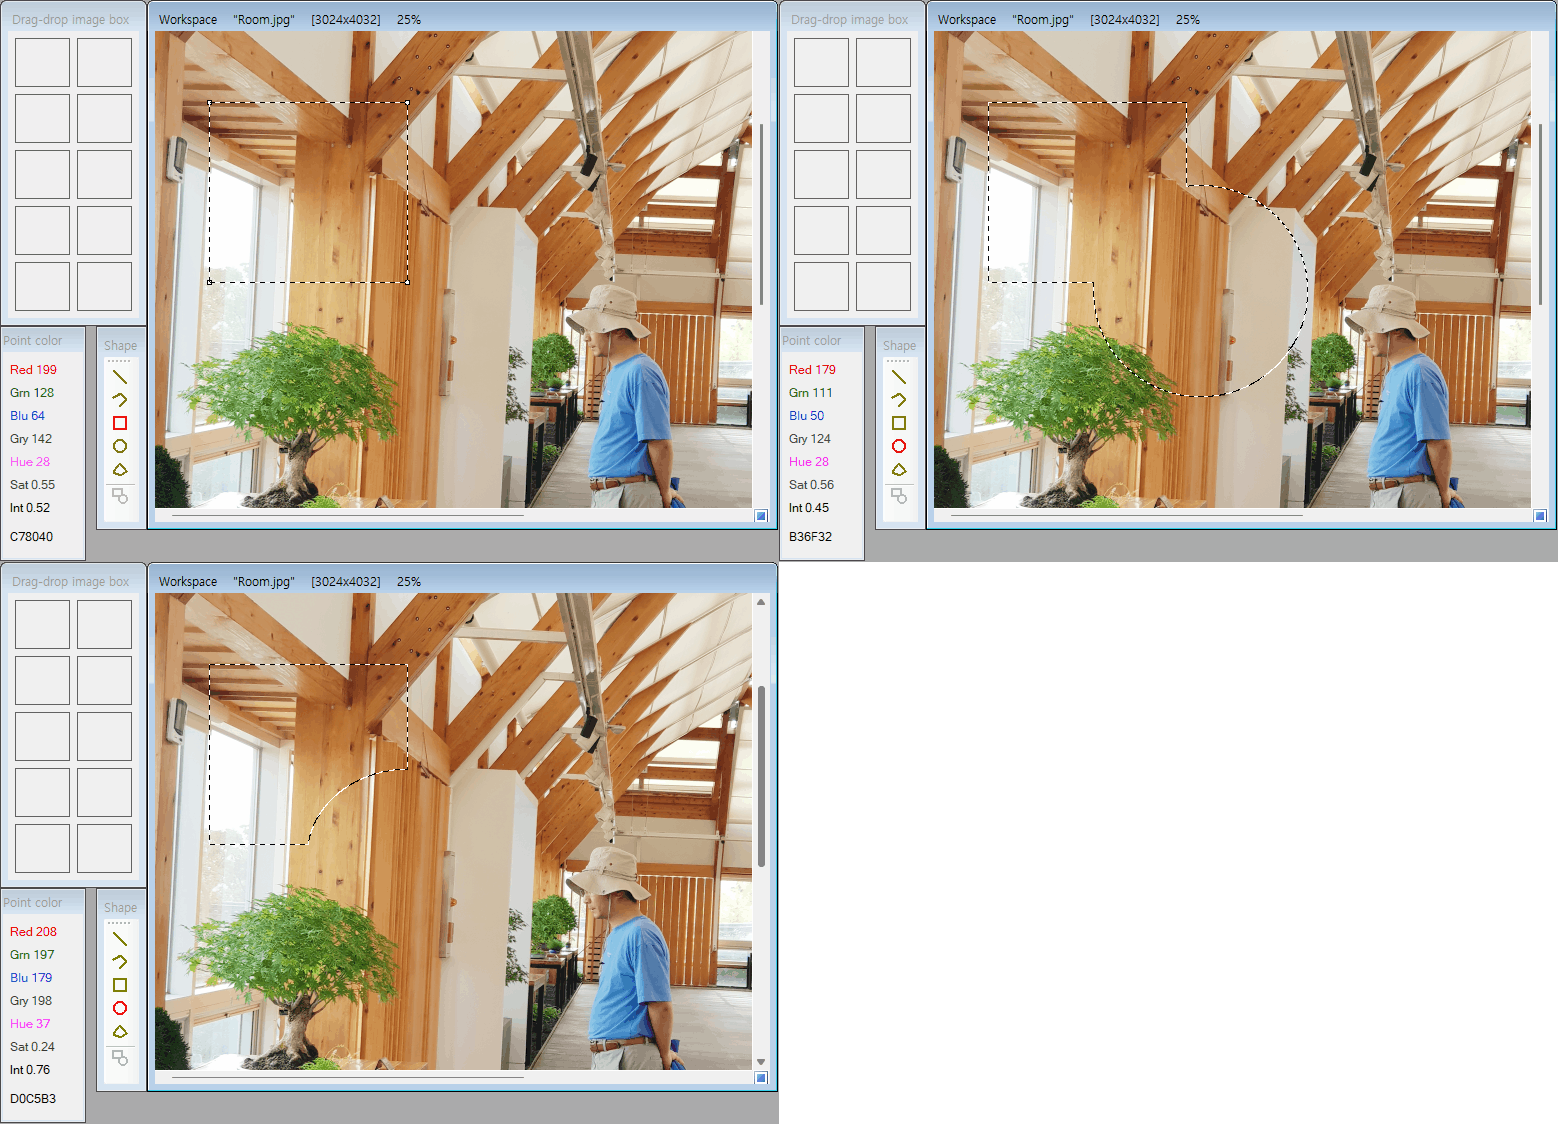
1. Adding and Subtracting Regions (Compound Masks)
- Add to Selection (
Ctrl): Hold theCtrlkey while drawing a new shape to add it to your existing selection. This is perfect for selecting multiple disconnected objects. - Subtract from Selection (
Alt): Hold theAltkey while drawing to subtract (erase) that specific area from your current selection.
[Add to Selection: Hold the Ctrl key while drawing a circle to add it to an existing rectangular selection]
[Subtract from Selection: Hold the Alt key while drawing a circle to subtract it from an existing rectangular selection]
2. Proportional Drawing and Resizing (The Shift Key)
The Shift key acts as a geometry lock, ensuring your shapes remain perfect:
- Create Perfect Shapes: When creating a new Rectangle or Circle, hold
Shiftto lock the width and height. This will generate a Perfect Square or a Perfect Circle (1:1 ratio). - Maintain Aspect Ratio: When resizing an existing Rectangle or Circle by dragging its corners, hold
Shiftto scale the shape up or down while strictly maintaining its original aspect ratio.
3. Orthogonal Movement Lock
- Locked Dragging: Need to move a selection perfectly straight? Hold
Shiftwhile dragging an active selection region. The software will lock the movement to a strict Horizontal or Vertical axis, preventing accidental diagonal shifts.
↩️ Undo & Redo Support
PhenoCapture AI features a robust Undo/Redo system that fully supports all region selection actions. Every time you change a shape, resize a boundary, move a selection across the canvas, or apply a mask operation, your progress is automatically saved to the undo stack.
This allows you to freely experiment with complex shapes and binary mask arithmetic. If you make a mistake or want to revert a transformation, simply use the standard Undo (Ctrl + Z) and Redo (Ctrl + Y) shortcuts to step back and forth through your selection history.
🧲 Magnetic Snap & Auto-Routing (For Path and Polygon)
When drawing complex freehand shapes using the Path or Polygon tools, you can activate our intelligent edge-detection system. Instead of meticulously clicking every single point along a border, these tools automatically detect object edges and perfectly hug their contours as you trace!
To learn how to configure the search radius, sensitivity, and hands-free automatic point placement, please read our full dedicated tutorial:
👉 A Complete Guide to Magnetic Snap & Auto-Routing
⚙️ Advanced Selection Operations
Once you have drawn a selection, PhenoCapture AI provides a powerful suite of mathematical and binary operations to modify your mask. These tools can be accessed directly from the menu and are essential for fine-tuning your regions before analysis.
1. Modifying and Reshaping Selections
Adjust the boundaries of your active selection using morphological operations or quickly invert your targets.
- Expand Selection & Expand Selection by Pixels:
Need to capture a slightly larger area? This tool dilates the selection boundary outwards. You can use the default pixel radius for a quick expansion or specify an exact pixel value for precise dilation. - Shrink Selection & Shrink Selection by Pixels:
If your selection is picking up unwanted background noise at the edges, use this tool to erode the boundary inwards. Like expansion, you can use a default step or define an exact pixel value. - Reverse Selection:
Instantly invert your current region selection mask across the entire canvas. This is highly useful when it is easier to select the background and then reverse it to capture complex objects. - Unselect:
Quickly clear all active selection shapes and masks from your workspace. (Shortcut: Press theDeletekey).
2. Binary Mask Interoperability
For complex image analysis, standard vector shapes are sometimes not enough. Seamlessly bridge the gap between vector shapes and pixel-based binary images.
- Create Selection From Binary Image:
Convert any black-and-white mask image directly into an active, interactive selection region on your workspace. - Add Binary Image to Selection:
Merge new white areas from a binary image into your currently active selection mask. - Subtract Binary Image from Selection:
Use a binary image as a “cookie cutter” to subtract specific shapes from your current selection mask. - Paste Selection As Binary:
Extract your current active selection shape and paste it as a standalone, black-and-white binary mask image for further processing.
3. Precision Control & Buffering
Take absolute control over your selection dimensions and manage your workflow efficiently.
- Set Selection Box Size:
Bypass manual dragging and define the exact numerical width and height (in pixels) for your selection boxes. Perfect for creating standardized crop areas across multiple images.