🌓 A Complete Guide to Shadows & Highlights
PhenoCapture AI’s Shadows & Highlights feature is an essential tool for rescuing photos with tricky lighting. Have you ever taken a photo where the sky is blindingly bright, or a subject’s face is completely hidden in the dark? Instead of changing the brightness of the entire picture and ruining the good parts, this tool lets you selectively fix only the overly dark or overly bright areas.
Here is everything you need to know to balance the lighting in your photos perfectly.
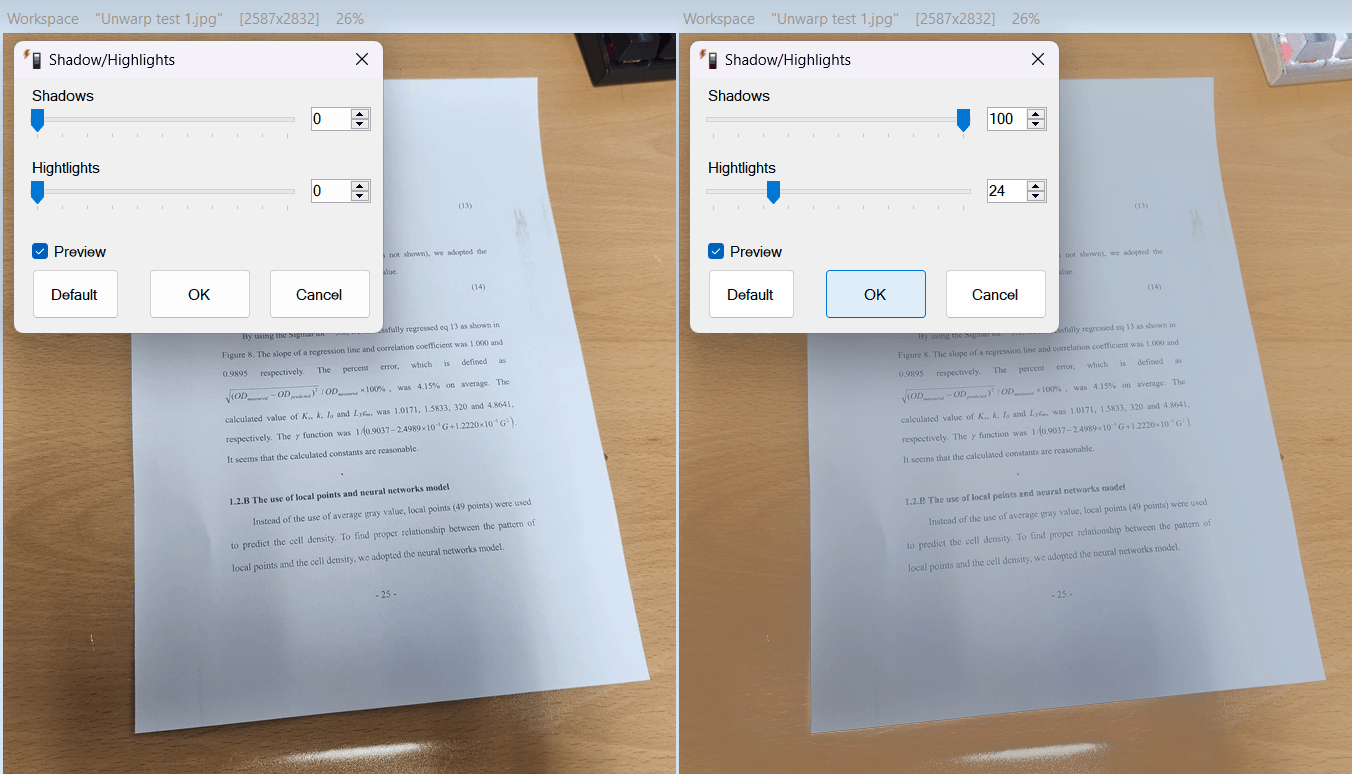
💡 Key Features
- Targeted Shadow Recovery: Bring out the hidden details trapped in the darkest areas of your image without washing out the rest of the photo. Perfect for backlit portraits or deeply shadowed rooms.
- Highlight Taming: Tone down areas that are overly bright or blown out, such as harsh sunlight or glare, revealing textures and colors that were previously invisible.
- Real-Time Preview: See every micro-adjustment happen instantly on your main canvas. The ultra-fast preview engine lets you find the perfect balance without any lag or guesswork.
- Precision Control: Use intuitive sliders for quick adjustments, or type in exact numbers for meticulous, fine-tuned control over your lighting.
🛠️ How to Use Shadows & Highlights
Fixing the lighting balance of your photo is incredibly simple. Just follow these steps:
Step 1: Enable the Preview
Open the Shadows & Highlights tool and make sure the Preview box is checked. This ensures you can watch your image transform in real time as you adjust the settings.
Step 2: Recover the Shadows
If your image has areas that are too dark, gently increase the Shadows slider. You will notice that only the dark patches begin to brighten up, revealing hidden details while leaving the properly lit areas completely untouched.
Step 3: Tame the Highlights
If parts of your image are too bright or washed out, slowly increase the Highlights slider. This will naturally dim the overly bright spots, bringing back rich colors and textures to skies, reflections, or brightly lit surfaces.
Step 4: Apply Your Adjustments
Once your image lighting looks perfectly balanced, simply click OK to apply the changes.
(Tip: If you push a slider too far and want to start over, just click the Default button to instantly reset both the shadows and highlights to zero!)
With the Shadows & Highlights tool, you have the power to instantly rescue photos with challenging lighting, giving your images a professional, perfectly exposed look in just a few clicks!