✨ A Complete Guide to the Expand Selection Tool
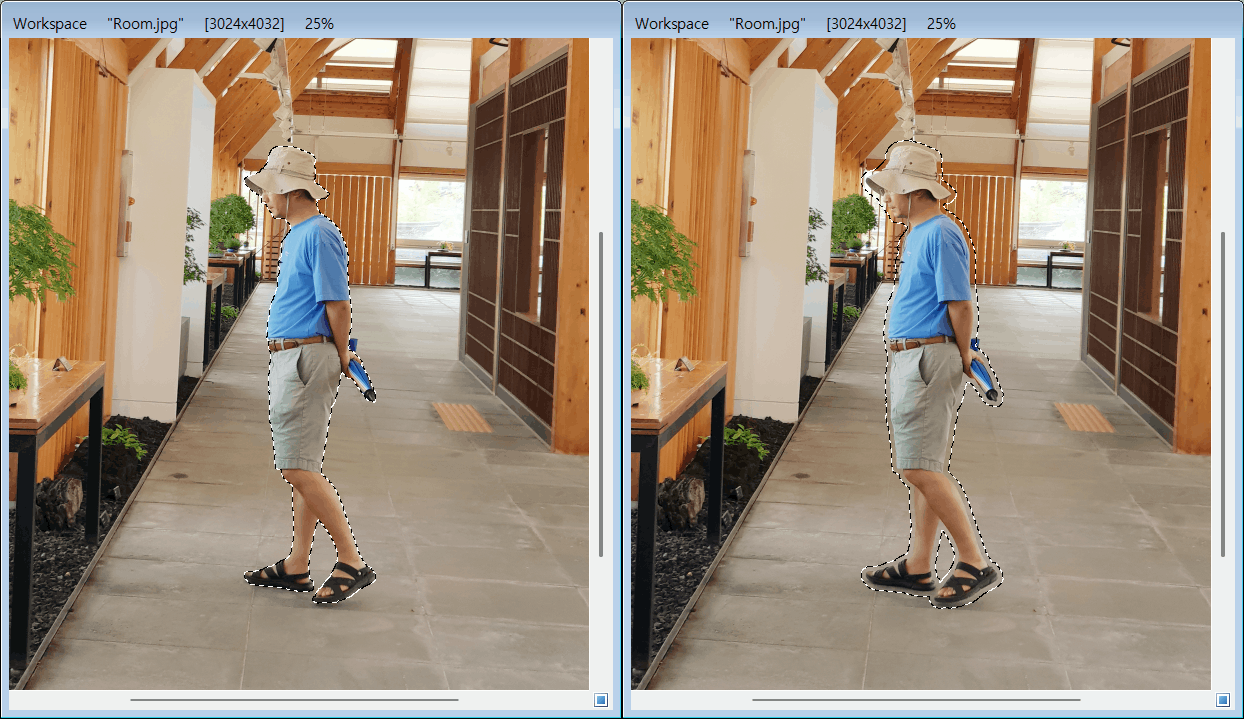
PhenoCapture AI’s Expand Selection tool allows you to seamlessly grow the boundaries of your currently active selection outward. Whether you need to add a precise safety buffer around an isolated biological subject or expand a tightly cropped region to include nearby background context, this tool handles the boundary calculation instantly.
💡 Key Features
- Two Expansion Modes:
- Quick Default Expand: Instantly grow your selection by a standard, preset size with a single click.
- Custom Pixel Expand: Need exact control? You can manually specify the expansion size anywhere from 1 to 100 pixels, allowing for perfectly tailored boundary growth.
- Smart Shape Handling: The tool intelligently adapts to whatever selection method you are using. It smoothly pushes out the borders of perfect geometric shapes (like Rectangles and Circles) and perfectly traces the complex, irregular contours of freehand polygons or AI-generated masks.
- Lightning-Fast Processing: Built with a highly optimized internal calculation engine, the tool expands even the most complex and jagged selection masks instantly, ensuring your workspace remains completely responsive.
- Safe and Reversible: Directly integrated with PhenoCapture AI’s undo system. If the expansion buffer is too large or too small, simply undo the action and try a different pixel value!
🛠️ How to Use the Expand Selection Tool
Step 1: Create Your Initial Selection
Before using this tool, ensure you have an active selection on your image. You can use any tool—such as the Rectangle, Circle, Polygon, or even the AI Auto Subject Selection—to define your starting area.
Step 2: Choose Your Expansion Method
Navigate to your selection menu and choose how you want to grow the boundary:
- Click Expand Selection to quickly push the boundary outward by the software’s default size.
- Click Expand Selection by Pixels… to open a prompt window. Type in your exact desired thickness (between 1 and 100 pixels) and click OK.
Step 3: Apply and Review
The software will instantly calculate the new perimeter and push your selection mask outward uniformly. If the new boundary isn’t exactly what you need, just use the Undo shortcut and enter a different pixel value!