✨ A Complete Guide to the Custom AI Binarization Model Trainer
PhenoCapture AI includes a dedicated, easy-to-use Image Segmentation Trainer. This standalone tool allows you to train your very own artificial intelligence models to binarize images exactly the way you want. By providing the AI with examples of what your original images look like and what the perfect black-and-white result should be, the software learns your specific needs and creates a custom model ready to be used in PhenoCapture AI.
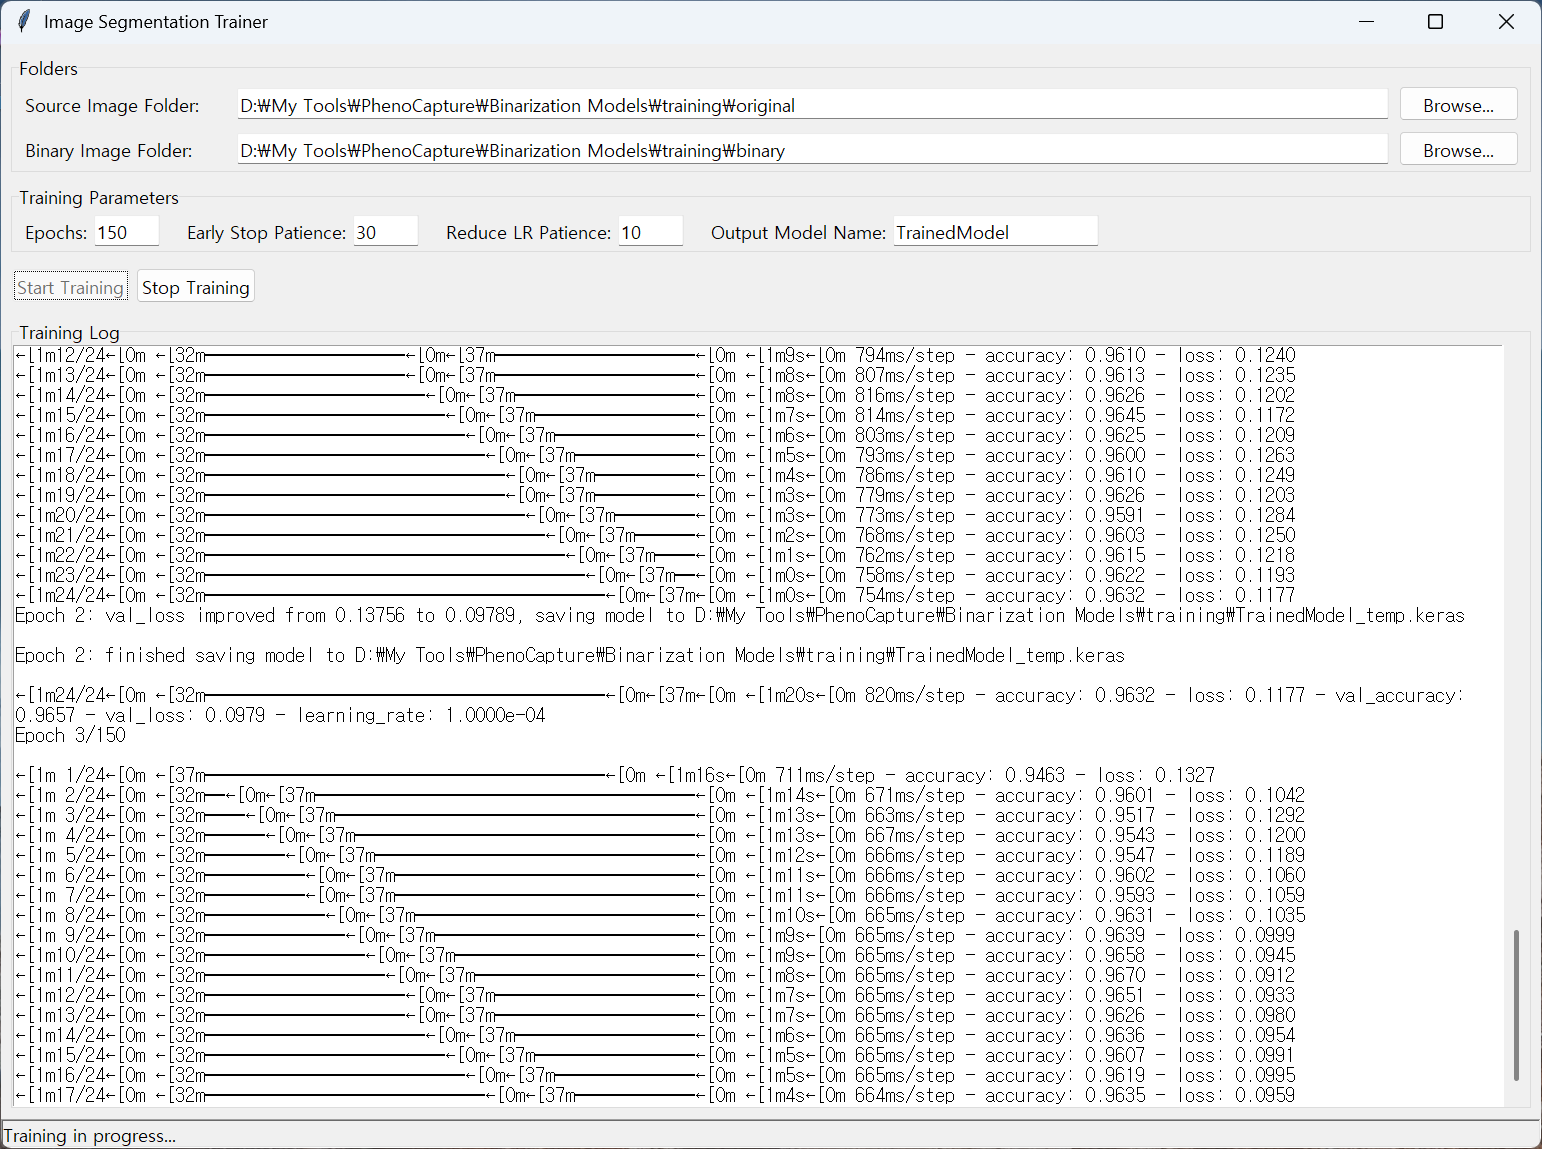
💡 Key Features
- Automated Setup: The trainer handles all the heavy lifting in the background. If your system is missing any required AI components, the tool will automatically download and configure them for you before launching the interface.
- Simple Folder Management: No complex programming is required. Simply place your original images in one folder, and your hand-drawn or pre-processed perfect binary masks in another. The trainer automatically pairs them up.
- Smart Training Algorithms: The AI includes built-in intelligence to prevent over-training. It actively monitors its own learning progress and will automatically adjust its learning speed or stop entirely once it realizes it has reached peak accuracy.
- Live Progress Tracking: A built-in log window provides real-time updates on the training progress, estimated time remaining, and current accuracy, so you always know exactly what the engine is doing.
- Ready-to-Use Output: Once the training is complete, the tool automatically packages and exports your custom model into a universal format that can be instantly loaded into PhenoCapture AI’s Custom AI Binarization menu.
🛠️ How to Train Your Custom AI Model
Step 1: Prepare Your Training Data (512×512 pixels)
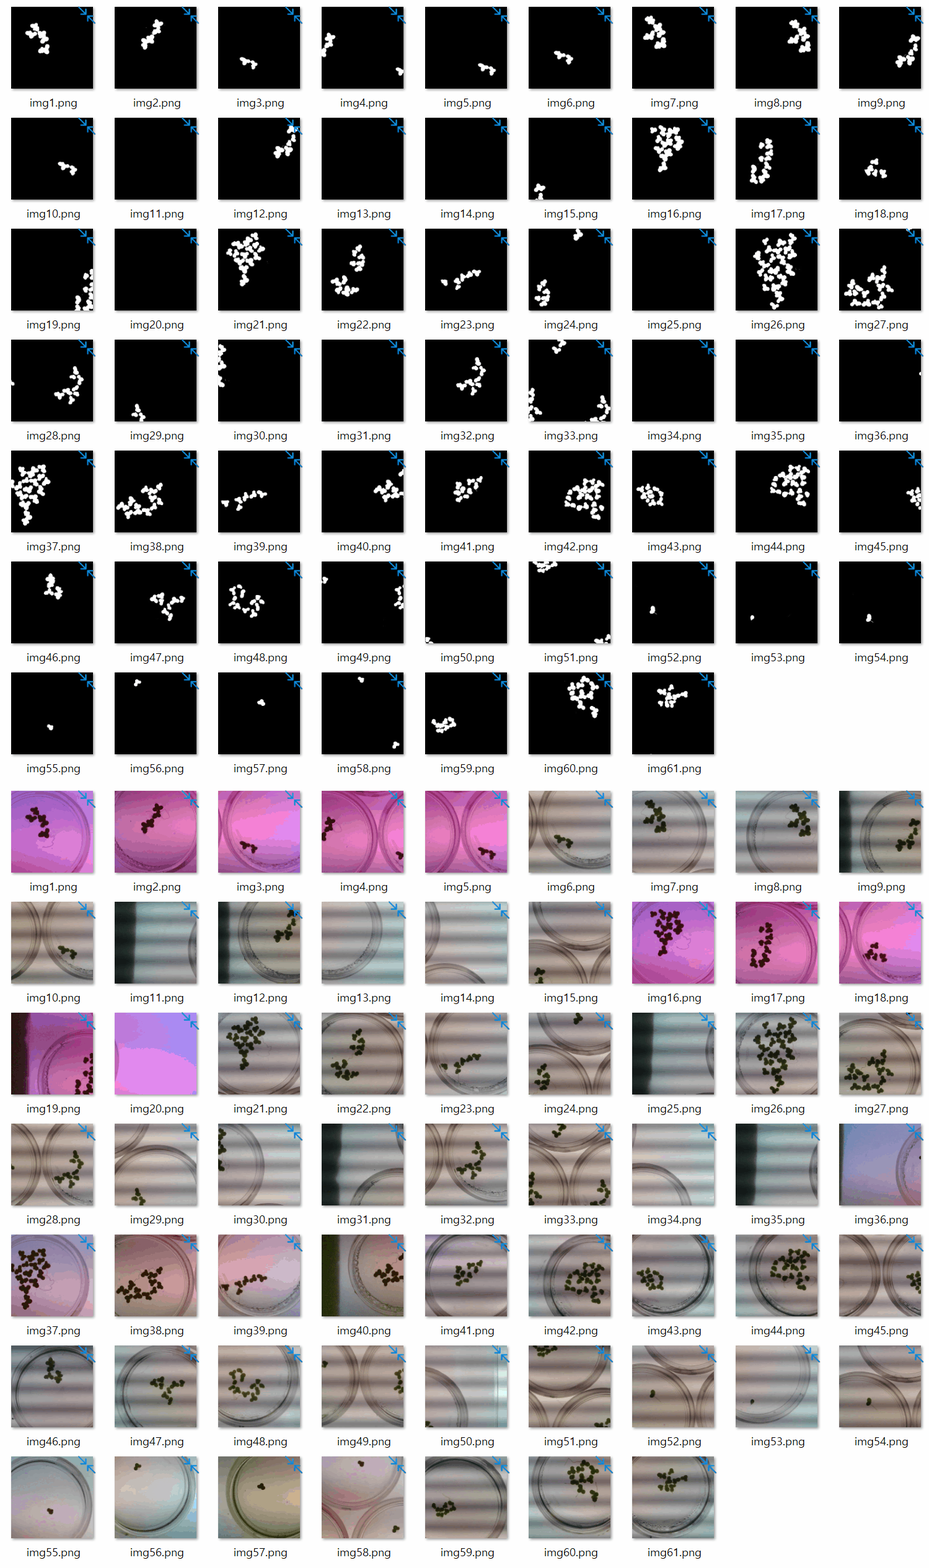
To teach the AI, you need to provide it with “before” (original) and “after” (binary) examples. Important: All images provided for training must be exactly 512×512 pixels in size.
- Create a folder named Original and place your original color or grayscale images inside.
- Create a second folder named Binary and place your perfect black-and-white mask images inside. Note: Make sure the file names in both folders match exactly so the AI knows which mask belongs to which original image!
💡 Sample Data Included: To help you test the trainer immediately, a sample dataset is provided! You can find a complete set of original and binary images of duckweed (plants) located in the Binarization Models subfolder within your PhenoCapture AI installation directory.
Step 2: Configure the Trainer
Launch the Image Segmentation Trainer tool.
- Folder Selection: Click “Browse” to select your Source and Binary folders.
- Training Rounds (Epochs): Set the maximum number of times the AI should review your images to learn from them.
- Patience Settings: These safety limits tell the AI how long it should keep trying if it stops improving. You can usually leave these at their default values!
- Model Name: Type in a memorable name for your new custom model.
Step 3: Start Training
Click Start Training. The AI will begin analyzing your images, automatically rotating and shifting them slightly to learn as much as possible from your data.
You can watch the log window to see its progress. If you need to stop early, simply click Stop Training, and the tool will safely finish its current cycle and save your progress. Once finished, your new custom model file (an ONNX file) will be generated.
Step 4: Deploy and Use Your Model in PhenoCapture AI
Once you have your generated ONNX model, integrating it into the software is incredibly simple:
- Auto-Registration in Menu: Place your new
.onnxfile directly into theBinarization Modelsfolder in the PhenoCapture AI installation directory. When you launch PhenoCapture AI, it automatically scans this folder and dynamically registers the file into the MDI form menu (using the file name, without the extension). - One-Click Inference: To binarize an image, simply click your newly registered custom model from the menu! The software will instantly run the ONNX inference in the background and seamlessly convert your original image into a highly accurate binary image based on your training.
- 💡 Pre-installed Default Model: By default, a fully trained
Duckweed.onnxmodel is already included in theBinarization Modelsfolder. You can click it in the menu right now to see the inference process in action!