🧼 A Complete Guide to Smart Denoise
PhenoCapture AI’s Smart Denoise feature is an advanced tool designed to clean up grainy, noisy photos without ruining their crisp details. Whether you are dealing with a grainy photo taken at night with your smartphone, or a scanned document covered in digital static, this intelligent filter smooths out the imperfections while keeping the important edges sharp.
Here is everything you need to know about using this feature to achieve silky-smooth images.
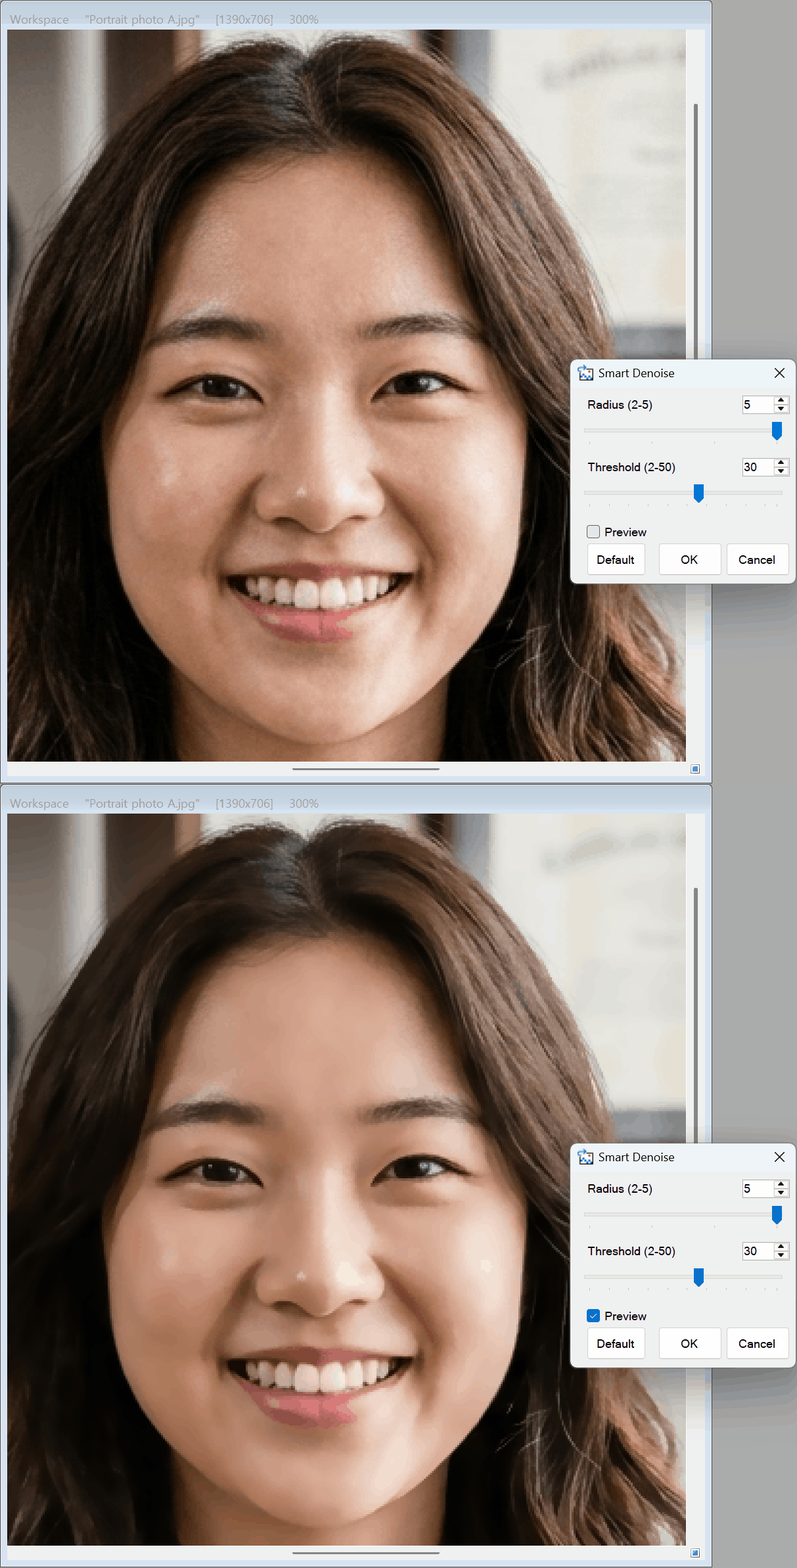
💡 Key Features
- Edge-Preserving Technology: Unlike basic blur filters that make your entire image look soft and out of focus, Smart Denoise intelligently detects the edges of objects and text. It only smooths the flat, noisy areas, preserving the crucial details.
- Zoom-Aware Preview: The real-time preview dynamically adjusts to your zoom level. Even if you zoom out to see the whole image, the tool scales its processing power so you always get an accurate preview of the final result.
- Customizable Radius & Threshold: You have total control over the cleanup process. The Radius determines how wide of an area to look for noise, while the Threshold dictates how different a pixel needs to be before it is considered “noise.”
- Zero-Lag Performance: Built with synchronous optimization, you can drag the sliders and instantly see the noise melt away without any stuttering or waiting.
🛠️ How to Use Smart Denoise
Cleaning up your grainy photos is quick and highly intuitive. Just follow these simple steps:
Step 1: Enable the Preview
Open the Smart Denoise tool and ensure the Preview checkbox is enabled. This lets you watch the noise disappear in real time as you adjust the sliders.
Step 2: Adjust the Radius
Start by gently increasing the Radius slider.
- A lower radius is perfect for cleaning up fine, sand-like grain in high-quality photos.
- A higher radius aggressively smooths out larger, blocky noise patches.
Step 3: Dial in the Threshold
Next, adjust the Threshold slider to protect your details.
- A lower threshold strictly protects details, but might leave some stubborn noise behind.
- A higher threshold creates a smoother surface, but if pushed too far, it might start softening the important edges of your subject.
- Find the sweet spot where the background is smooth, but the edges remain sharp.
Step 4: Apply the Final Polish
Once you are happy with the clean, noise-free preview, click OK. The Smart Denoise filter will be permanently applied, leaving you with a flawless image!
(Tip: If your image starts looking too artificial or “plastic,” just click the Default button to instantly reset the sliders and try again.)
With the Smart Denoise tool, removing ugly grain and digital static from your images is effortless, ensuring your photos and documents always look professional and pristine!