📐 Guide to Setting a Precise Selection Rectangle
PhenoCapture AI’s Set Selection Rectangle tool provides exact, pixel-perfect control over your region of interest. Instead of manually dragging your mouse to guess the correct size, this tool allows you to input specific dimensions and coordinates. It is incredibly useful when you need to analyze multiple images using the exact same sampling area or when standardizing image crops.
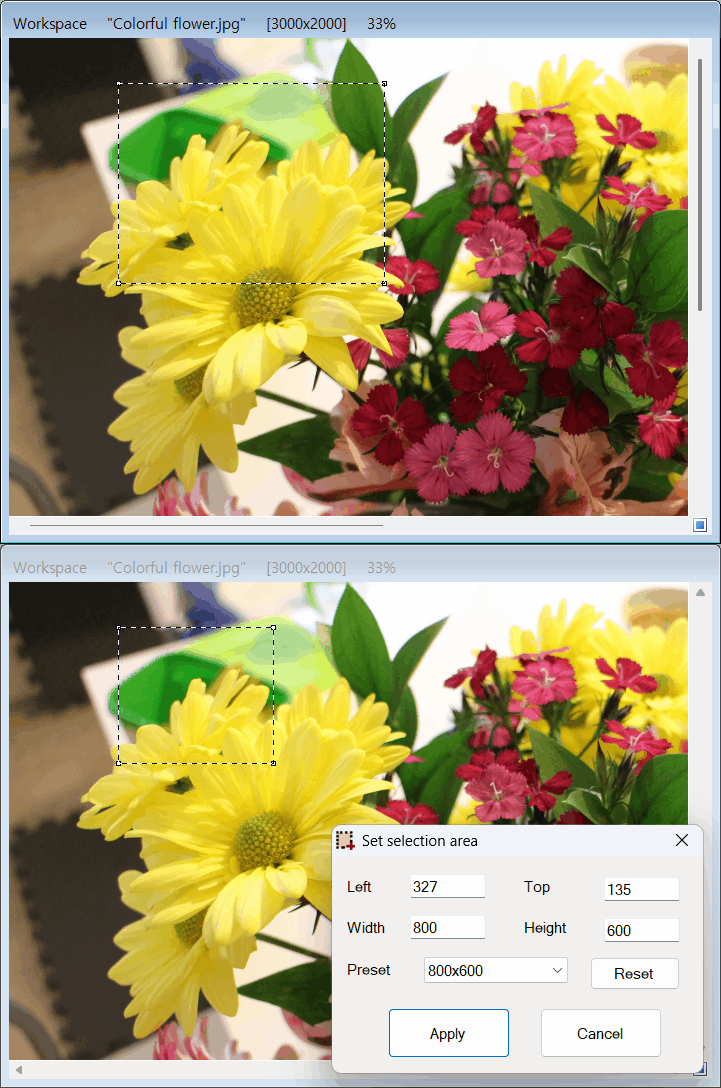
💡 Key Features
- Smart Boundary Constraints: You never have to worry about accidentally setting a selection outside of your image. The software automatically calculates your image boundaries and restricts the maximum width and height to ensure your rectangle fits perfectly within the canvas.
- Minimum Size Protection: To prevent invisible or un-clickable selections, the tool enforces a minimum rectangle size of 5×5 pixels.
- Dynamic Preset Memory: Whenever you type in a custom width and height and apply it, the tool automatically saves that specific dimension (e.g., 800×600) to your dropdown list for the rest of your session. You can instantly recall it next time without re-typing!
- Standard Quick Presets: The tool comes pre-loaded with standard resolution presets (such as 320×240, 640×480, 1280×720, and 1280×800). You can restore these default presets at any time by clicking the Reset button.
🛠️ How to Set a Custom Rectangle
Setting up your precise region takes just a few simple steps:
Step 1: Open the Tool
Make sure you have a rectangular or circular selection mode active on your workspace, then open the Set Selection Rectangle tool. If you already have a selection drawn, its current coordinates will automatically populate the input boxes.
Step 2: Input Your Dimensions
You have two easy ways to set your size:
- Use a Preset: Click the Preset dropdown menu and select a standard resolution (like 1280×720). The Width and Height boxes will update automatically.
- Type Custom Values: Manually enter your desired Left (X coordinate) and Top (Y coordinate) starting points, followed by your exact Width and Height.
Step 3: Apply the Selection
Click the Apply button.
The tool will verify your numbers, gracefully adjust them if they exceed your image borders, and instantly snap the selection box on your main workspace to your exact specifications! If you ever want to back out without making changes, simply hit the Cancel button.