🗿 Emboss: Add 3D Depth and Texture
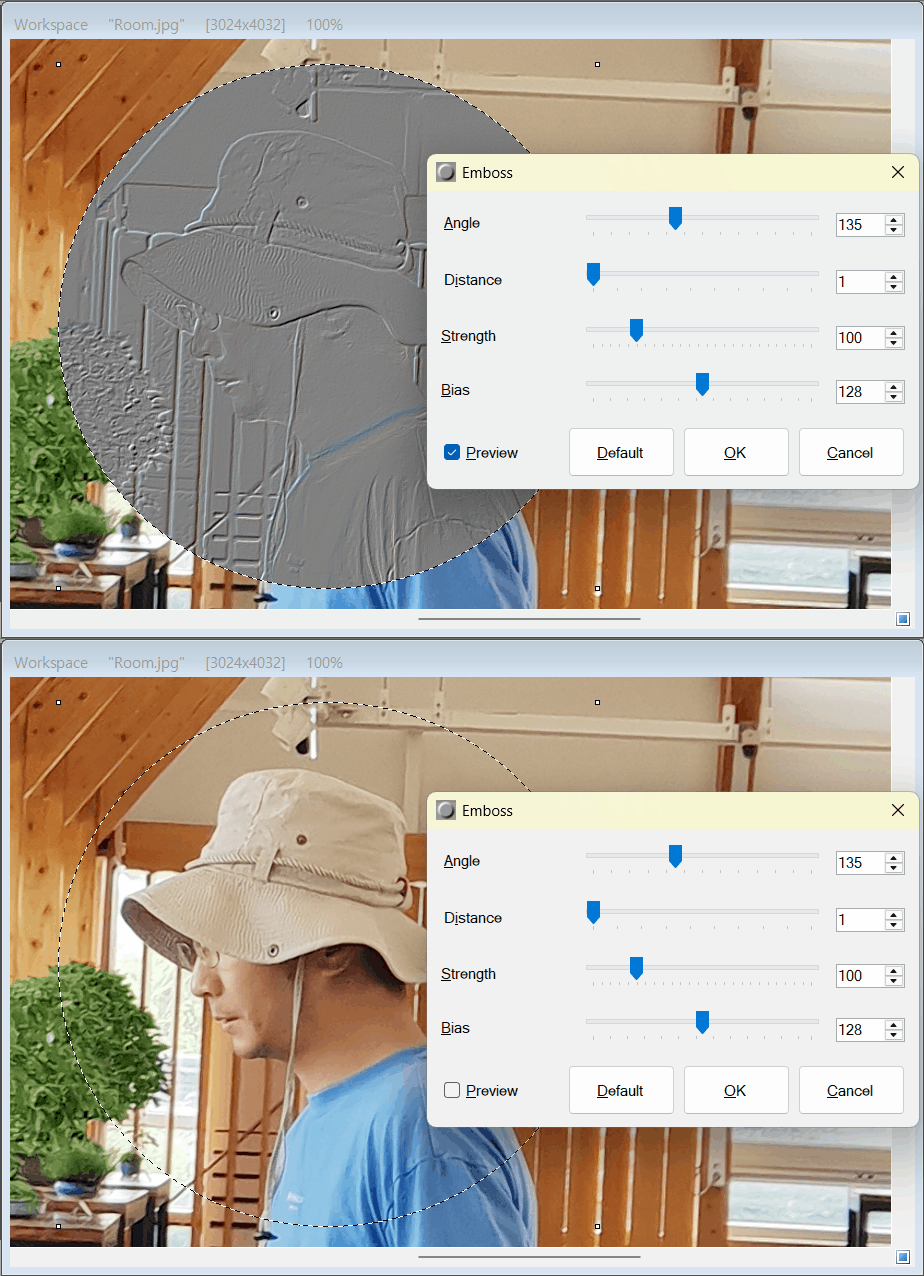
PhenoCapture AI’s Emboss feature effortlessly transforms flat, ordinary images into stunning 3D-like reliefs. By simulating a light source shining across your picture, it creates natural highlights and shadows that make photos, shapes, or text look as if they were carved out of stone or stamped into metal.
Whether you are looking to create an artistic background, design a stylish watermark, or give a premium tactile feel to your graphics, this tool makes the process incredibly simple.
💡 Key Features
- Directional Lighting (Angle): You have complete control over the simulated light source. Easily adjust the angle to dictate exactly where the shadows and highlights fall, perfecting the 3D illusion.
- Depth Control (Distance & Strength): Make the embossed effect as dramatic or as subtle as you need. Increase the distance for a deep, heavily sculpted look, and fine-tune the strength to soften or intensify the overall texture.
- Brightness Base (Bias): The bias setting shifts the overall brightness of your embossed image. While the default setting keeps it at a perfect, neutral mid-gray, you can adjust this to easily blend the embossed result into lighter or darker designs.
- Real-Time Smart Preview: No need to guess how your image will turn out. The live preview updates instantly as you move the sliders and perfectly synchronizes with your zoom level, ensuring that your adjustments are 100% accurate.
🛠️ How to Use the Tool
Creating a professional sculpted effect takes only a few simple adjustments:
Step 1: Set the Light Angle
Open the Emboss settings and start by adjusting the Angle slider. Imagine a light shining on your image—move the slider to change where that light is coming from, which will immediately alter the direction of the shadows.
Step 2: Adjust Depth and Intensity
Use the Distance slider to control how “raised” or “indented” the image appears. Then, tweak the Strength slider to make the effect sharper or softer. If the image looks too dark or too light for your project, simply adjust the Bias value to compensate.
Step 3: Preview and Apply
Make sure the Preview box is checked so you can watch your image transform in real-time. If you ever want to start over, just click the $$Default$$ button to reset the sliders. Once you are completely satisfied with the 3D texture, click $$OK$$ to apply the final effect.
With the Emboss tool, adding a professional, tangible depth to your images is easier than ever. Try applying it to bold text or logos for an instant, high-quality stamped appearance!