✨ A Complete Guide to AI Object Detection in PhenoCapture AI
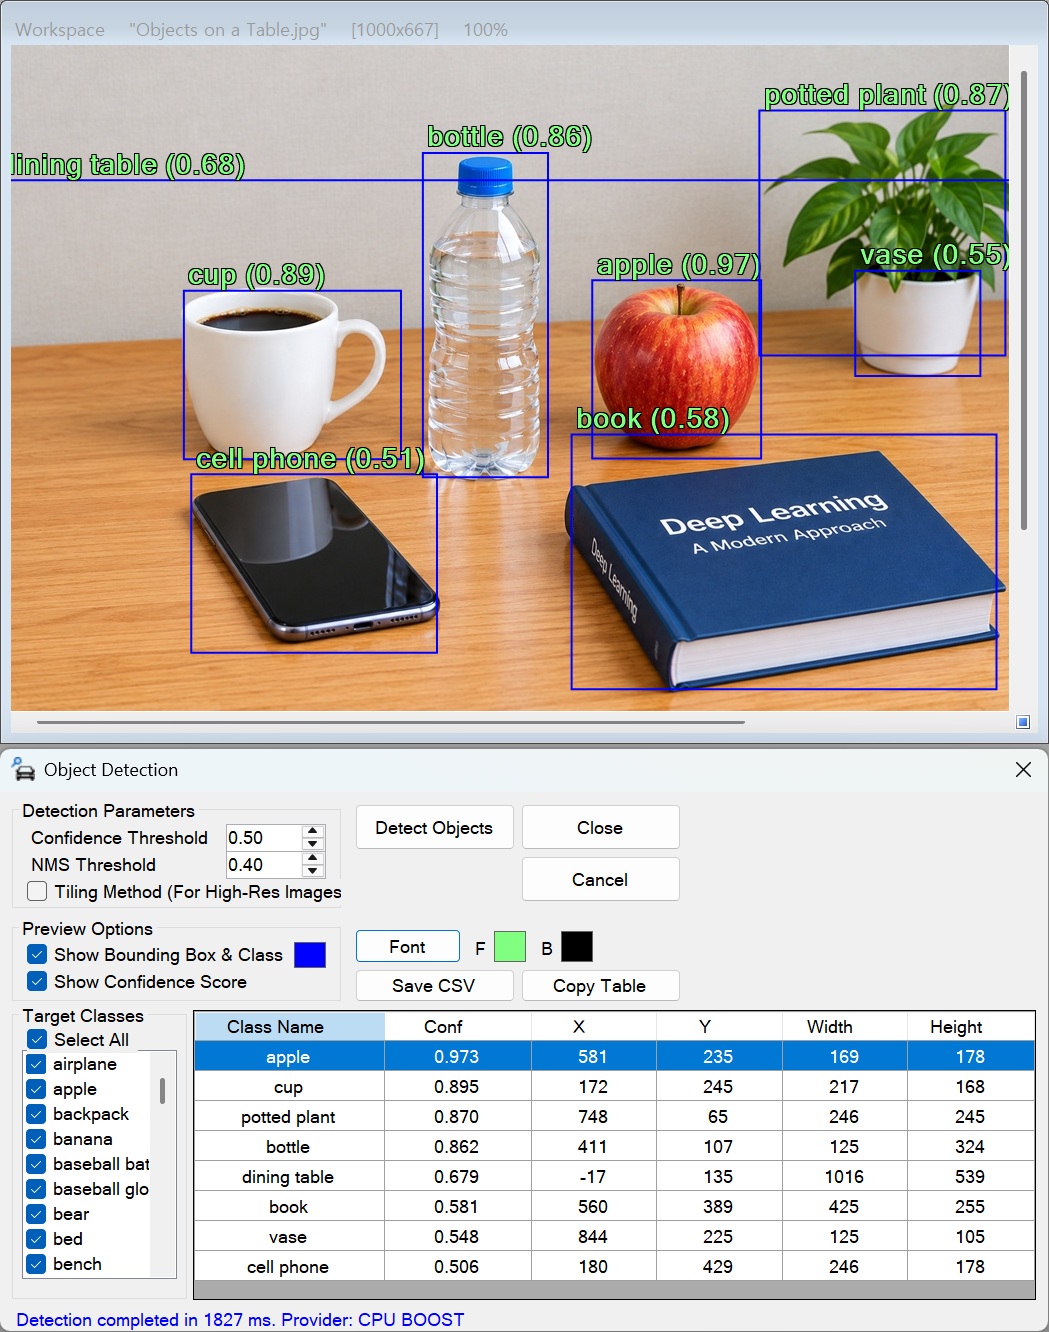
PhenoCapture AI’s AI Object Detection tool brings powerful computer vision capabilities directly to your workspace. Powered by a highly optimized YOLOv3 ONNX model, this tool can instantly identify, locate, and classify up to 80 different types of everyday objects within your images.
Whether you are analyzing complex scientific imagery, counting overlapping elements, or extracting bounding box data for machine learning datasets, this tool handles the heavy lifting with incredible speed and precision.
💡 Key Features
- Advanced ONNX AI & CPU Acceleration: Powered by the robust ONNX runtime, the detection engine takes full advantage of CPU Boost capabilities (including optimizations like OpenVINO for modern AMD/Intel processors), ensuring rapid inference times even on standard hardware without freezing your UI.
- Targeted Regional Detection: You do not have to scan the entire image! Use the selection tools to draw a boundary (marching ants) around a specific area. The AI will exclusively crop and analyze that region, and seamlessly map the detected bounding boxes back to the original image coordinates.
- Smart Image Tiling: Detecting objects in ultra-high-resolution images can sometimes reduce accuracy if the image is shrunk too much. By enabling the Use Tiling option, the software intelligently divides the image into smaller sliding windows, performs detection, and merges the results automatically.
- Real-Time Filtering & Visualization: Instantly filter through the 80 COCO classes (e.g., person, car, animal) using the checkbox list. Adjust the bounding box color, customize the text font, and toggle confidence scores on or off. The live preview updates immediately without needing to re-run the heavy AI calculations!
- Seamless Data Export: Need the raw data? The tool perfectly extracts the Class Name, Confidence Score, X, Y, Width, and Height of every detected object. You can instantly copy the entire table to your clipboard or save it directly as a CSV file for Excel or further analysis.
- Integrated Undo Engine: Once you apply the detection boxes to your workspace, the changes are safely stored in PhenoCapture AI’s Undo Engine, allowing you to easily revert to your original image if needed.
🛠️ How to Use the AI Object Detection Tool
Step 1: Prepare Your Workspace and Selection (Optional)
Load your image into the main workspace. If you only want to detect objects in a specific area, use the advanced selection tools to draw a boundary mask. Otherwise, the AI will analyze the entire image.
Step 2: Launch Detection
Open the YOLOv3 Object Detection tool. Adjust your Confidence Threshold (to filter out uncertain predictions) and NMS Threshold (to prevent overlapping boxes on the same object). If you are working with a very large image, check the Use Tiling box. Click [Detect]. A progress window will keep you updated as the asynchronous AI engine processes the image.
Step 3: Filter and Customize Your Results
Once detection is complete, the results will appear in the grid.
- Use the Select All Classes or individual checkboxes to show or hide specific object types.
- Click the Box Color palette or Font button to change how the bounding boxes and labels look on your image.
- Check or uncheck the options to show/hide the boxes and confidence scores. The workspace preview will update instantly!
Step 4: Export Data or Apply to Image
If you need the coordinates for research or reporting, click [Save to CSV] or [Copy Table]. When you are happy with the visual preview, simply click [Apply & Close] to permanently stamp the bounding boxes onto your workspace image.
(Tip: You can always use the standard Undo shortcut if you change your mind later!)
By leveraging PhenoCapture AI’s YOLOv3 Object Detection, extracting complex spatial data and visualizing multiple objects takes only seconds. Load your images and try detecting today!