💾 Save As: Export Your Images with Perfect Quality
PhenoCapture AI’s Save As feature gives you ultimate control over how your images are exported. Whether you need a high-resolution TIFF for printing, a transparent PNG for graphic design, or a highly compressed JPEG for quick web uploads, this tool ensures you get the perfect balance between image quality and file size.
Here is everything you need to know to export your images flawlessly.
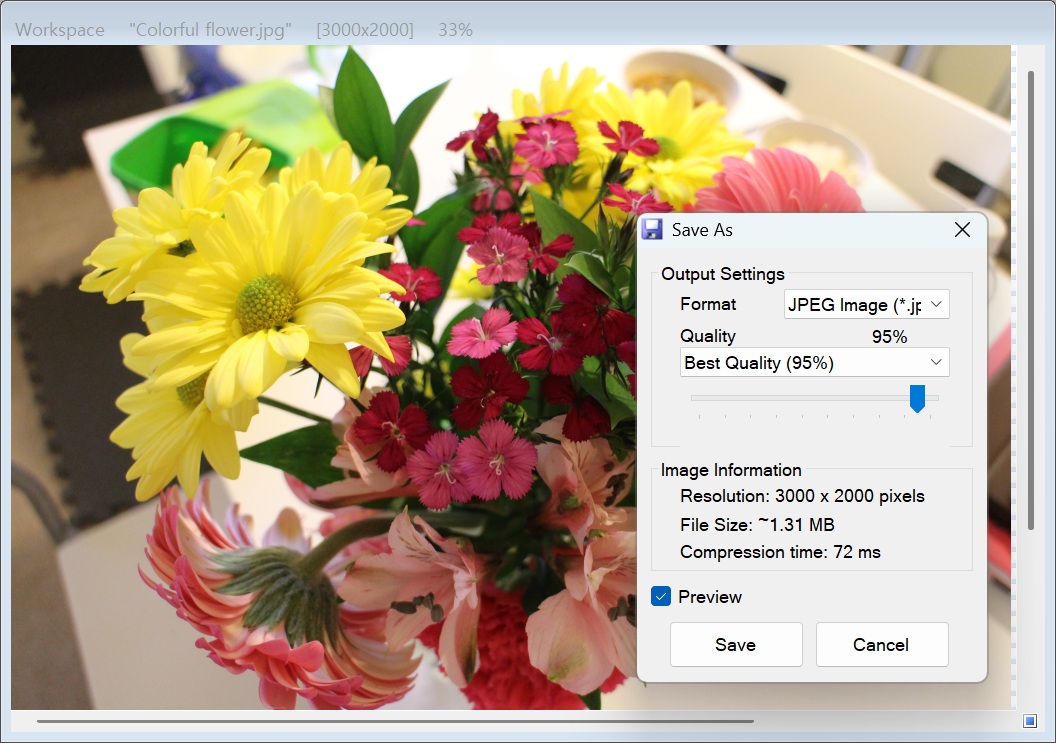
💡 Key Features
- Multiple Format Support: Save your work in all major image formats, including JPEG, PNG, BMP, TIFF, and GIF, ensuring full compatibility with any project.
- Smart Transparency Handling: When saving cut-out objects or selections, the tool intelligently adapts and prioritizes formats that support transparent backgrounds (like PNG and GIF), so your graphics remain clean and versatile.
- Real-Time Compression Preview: See exactly how your image will look before you save it! Toggle the preview option to instantly view the effects of JPEG compression, ensuring your image stays crisp without bloating the file size.
- Live File Size Estimation: As you adjust the quality slider, the tool calculates and displays the estimated final file size in real-time, helping you meet email or website upload limits effortlessly.
🛠️ How to Use the Save As Tool
Exporting your images is highly intuitive and optimized for the best results:
Step 1: Choose Your Format
Open the Save As window and select your desired file type from the dropdown menu. The tool will automatically provide the best format options based on whether your image requires transparency.
Step 2: Adjust Image Quality
If you are saving your image as a JPEG, you can use the preset dropdown or the slider to set your desired quality level (ranging from Maximum Quality 100% down to Maximum Compression 20%). If you are exporting a GIF, you can choose between a High Quality (Dithered) or Low Quality option.
Step 3: Check the Preview and File Size
Check the Preview box to see the compression applied directly to your image on the screen. As you move the quality slider, keep an eye on the estimated file size displayed on the screen to find the perfect sweet spot between a small file size and a clear image.
Step 4: Save Your Masterpiece
Once you are completely satisfied with the visual quality and the estimated file size, click the Save button to export your final image to your computer.
(Tip: If you decide you want to keep working before exporting, simply click the Cancel button to return to your workspace without saving.)
With the advanced Save As tool, exporting your photos, scans, and designs is completely optimized, giving you professional-grade control over your final files!