📹 A Complete Guide to Video Recorder
PhenoCapture AI’s Video Recorder is a professional-grade tool designed to capture high-quality video seamlessly from your webcam or connected camera. Powered by a high-performance background encoding engine, it ensures smooth, lag-free recording. With built-in support for AI virtual backgrounds and automatic audio synchronization, creating polished video content has never been easier.
Here is everything you need to know about recording flawless videos.
💡 Key Features
- Multiple Export Formats: Save your recordings exactly how you need them. Choose from modern MP4 for high-quality compression, standard WMV, or even create looping Animated GIFs directly from your live feed.
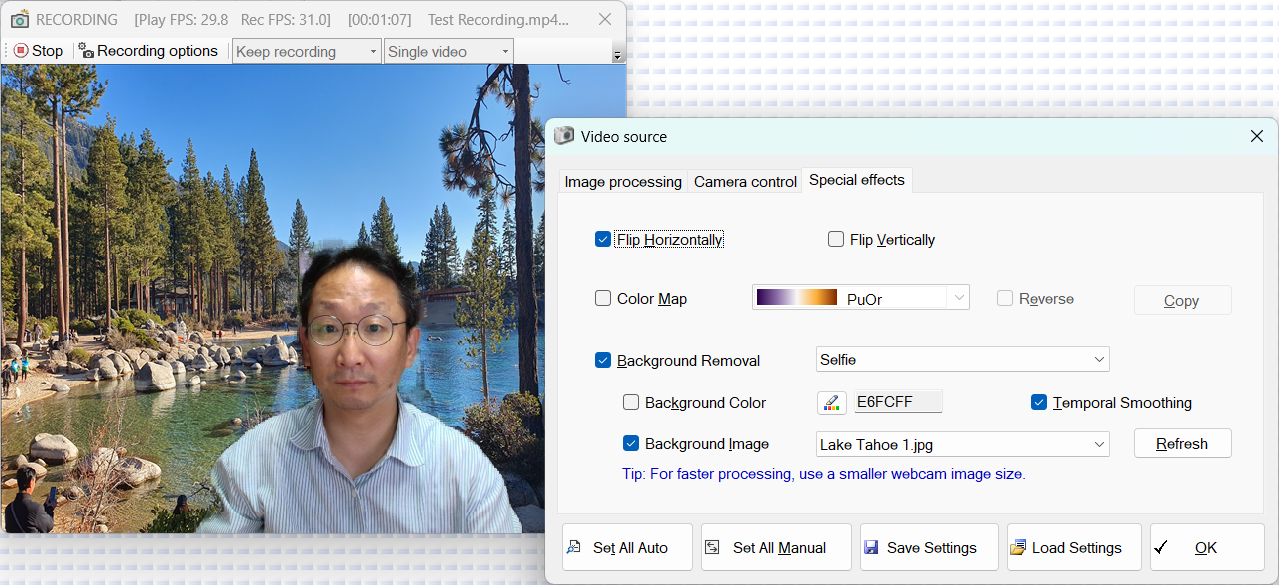
- AI Virtual Backgrounds: Protect your privacy or add a creative touch! The recorder integrates seamlessly with real-time AI background removal, allowing you to blur your room or replace it with a custom image while recording.
- Perfect Audio Synchronization: The tool automatically detects your best microphone and captures high-quality audio, perfectly syncing it with your video frames so you never have to worry about audio lag.
- Auto-Split & Duration Control: Recording a very long session? You can set a specific duration to automatically cut and save your video into manageable segments, preventing massive file sizes and potential data loss.
- Zero-Lag Performance: Utilizing an advanced background processing queue, the software handles heavy encoding tasks silently in the background, keeping your live preview completely smooth and responsive.
🛠️ How to Use the Video Recorder
Capturing a professional video is intuitive and takes just a few clicks. Follow these simple steps:
Step 1: Connect Your Camera
Open the Video Recorder and click the Connect button to activate your webcam or external camera. You will instantly see a live, high-definition preview of your video feed.
Step 2: Configure Recording Options
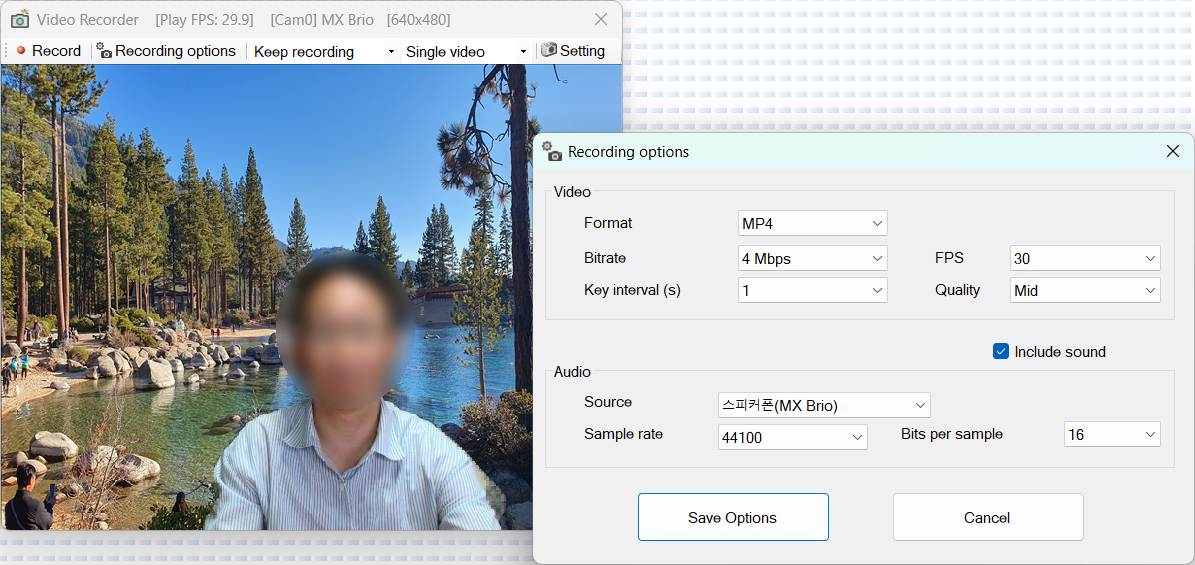
Click on the Recording Options to set your preferences.
- Choose your desired Format (MP4, WMV, or GIF).
- Select your Frame Rate (FPS) and Quality settings.
- Ensure the Include Sound box is checked if you want to record microphone audio.
Step 3: Choose a Save Location
Click the Save As (Destination) button to choose exactly where your final video file will be saved on your computer and give it a name.
Step 4: Start Recording
Once everything is set, click the Record button. The status bar at the top will update to show you the elapsed time, live FPS, and total recorded frames. If you need to stop recording automatically after a certain time, you can easily select a time limit from the Duration dropdown.
Step 5: Stop and Save
When you are finished, click the Stop button. The software will safely finalize your video and audio, ensuring the file is perfectly saved. A confirmation message will pop up with your recording details once it is complete!
With the Video Recorder, capturing smooth, professional-quality videos with crisp audio and AI-enhanced visuals is completely effortless!