✨ A Complete Guide to the Add Binary Image to Selection Tool
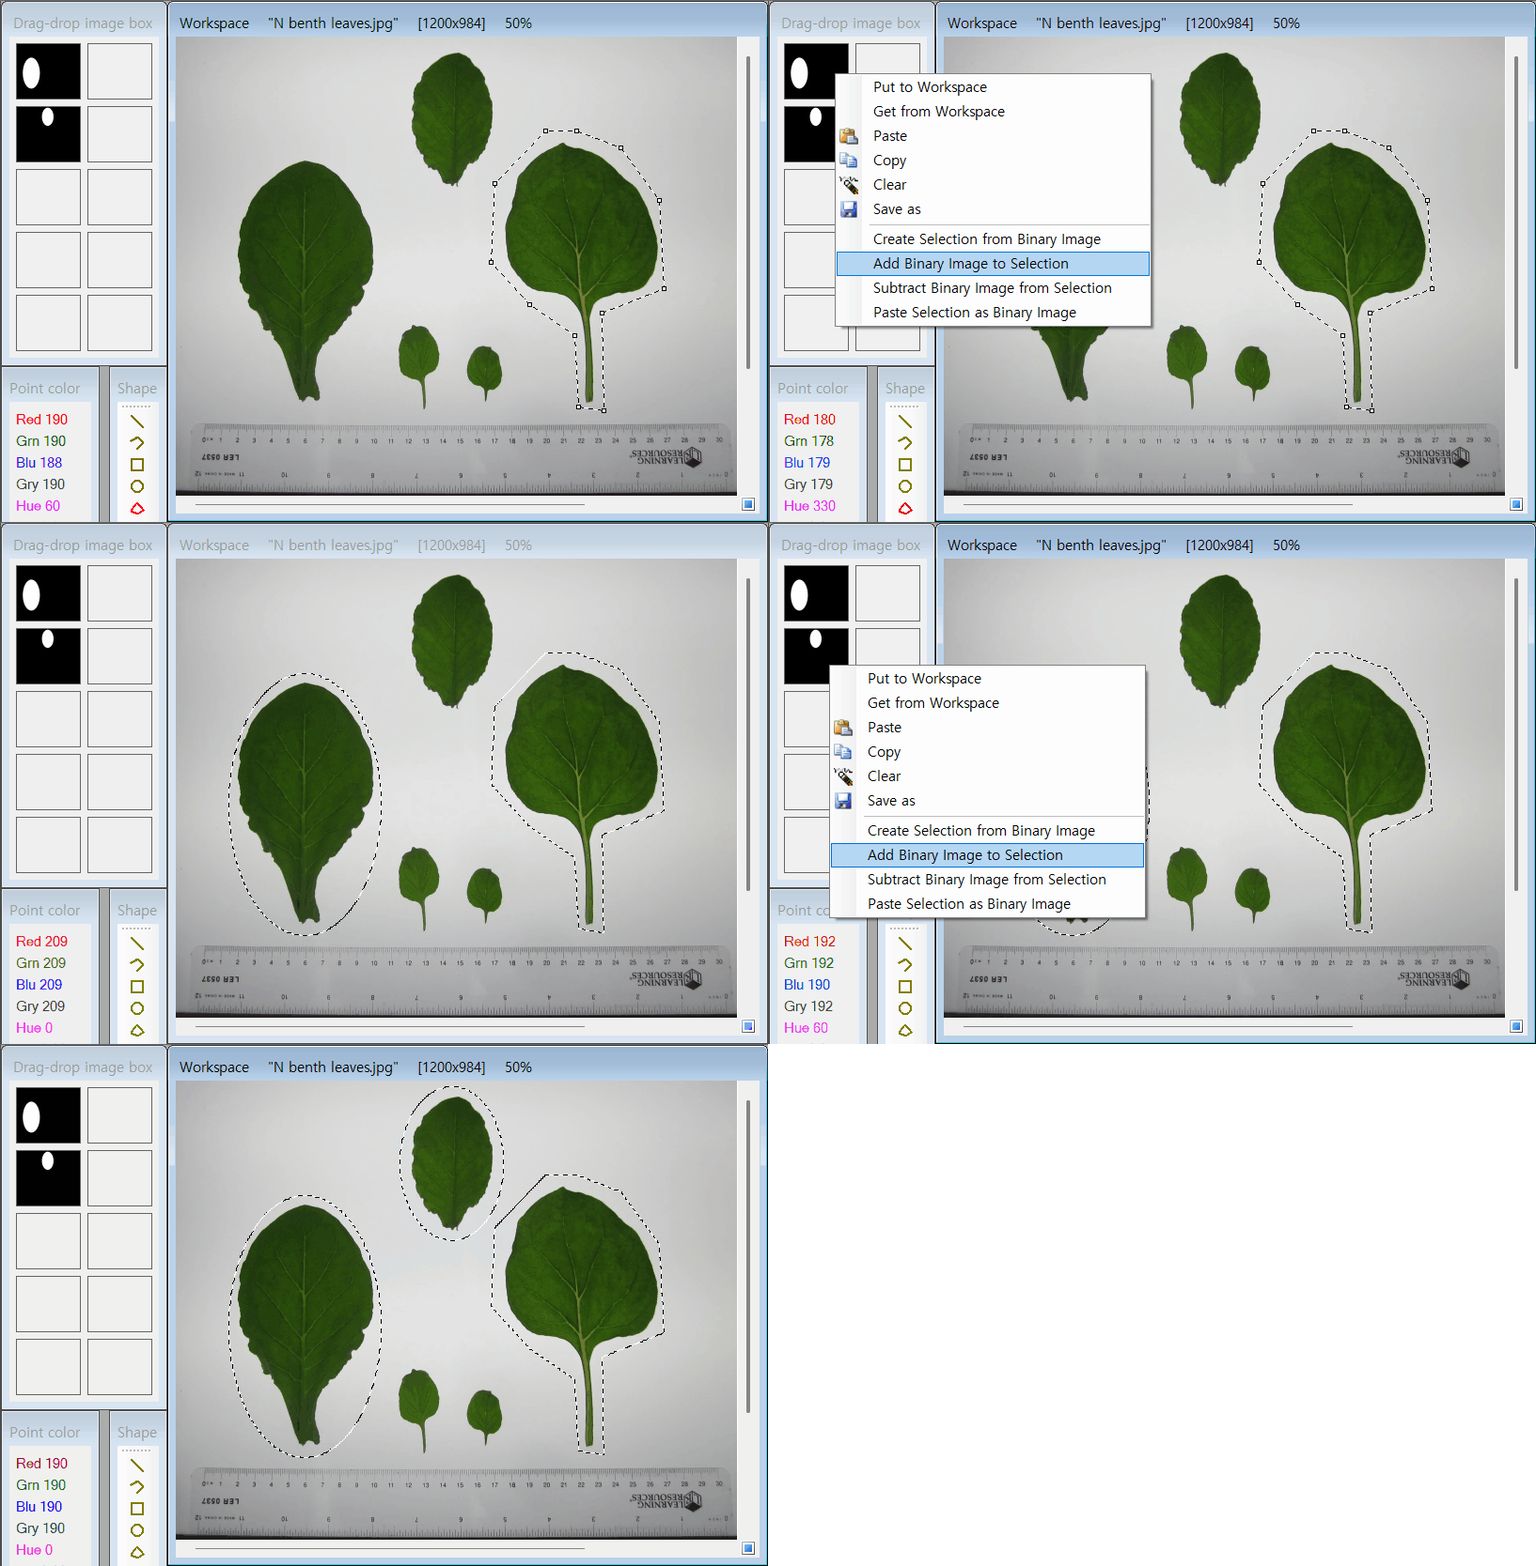
PhenoCapture AI’s Add Binary Image to Selection tool allows you to expand your currently active selection mask by seamlessly merging it with the shapes from another black-and-white (binary) image. Instead of completely replacing your current selection, this tool acts as an “additive” feature, making it perfect for combining multiple masks or building complex, multi-part selection regions step-by-step.
💡 Key Features
- Additive Masking (Union): The tool intelligently takes your existing selection and merges it with the white pixels of the targeted binary image. Both the old and new shapes are combined into one unified, active selection mask.
- Flexible Image Sources: You can pull the new binary shapes directly from the main workspace image, or conveniently grab them from any of your Drag & Drop Image Box slots (slots 1 through 10) to add them to your current workspace mask.
- Smart Binary Validation: Just like the creation tool, it automatically checks if your target image is a strict binary image before blending. If it detects grayscale or color data, it provides a helpful warning but allows you to override and proceed if you wish.
- High-Speed Parallel Blending: The engine rapidly scales and aligns the two masks, utilizing high-speed multi-core processing to blend them together perfectly without lagging your workflow, regardless of the canvas size.
- Seamless Undo Integration: Connected directly to PhenoCapture AI’s built-in undo engine, allowing you to instantly revert the addition and go back to your previous selection state if you change your mind.
🛠️ How to Use the Add to Selection Tool
Step 1: Prepare Your Active Selection and Binary Source
First, ensure you already have an active selection on your main workspace. Next, have the binary (black-and-white) image you want to add ready—either loaded in the workspace or parked in one of the numbered slots in your Drag & Drop Image Box.
Step 2: Execute the Addition
Navigate to your selection menu and click Add Binary Image to Selection (or select the specific Drag & Drop slot you wish to use).
Note: If the software detects that your source image isn’t perfectly black and white, it will prompt you with a warning. You can click “Yes” to force the merge anyway.
Step 3: Utilize Your Combined Selection
The software will instantly scan the new binary image, extract the white regions, and perfectly merge them with your existing selection. Your newly expanded, multi-part selection is now ready for your next editing or analysis step!