Professional Color Correction with CIE Lab* Adjustment
When editing photos or scanned documents, simply turning up the brightness can sometimes wash out vibrant colors, making the image look unnatural. This happens because standard color tools mix brightness and color data together. PhenoCapture AI solves this problem with its CIE Lab* Color Adjustment feature.
The Lab color space is a professional-grade tool that separates image lightness from its actual colors. This allows you to fix dark shadows, correct weird color tints, and enhance lighting without ruining the natural tones of your original image. It is an essential tool for photographers, designers, and anyone looking for perfect color balance.
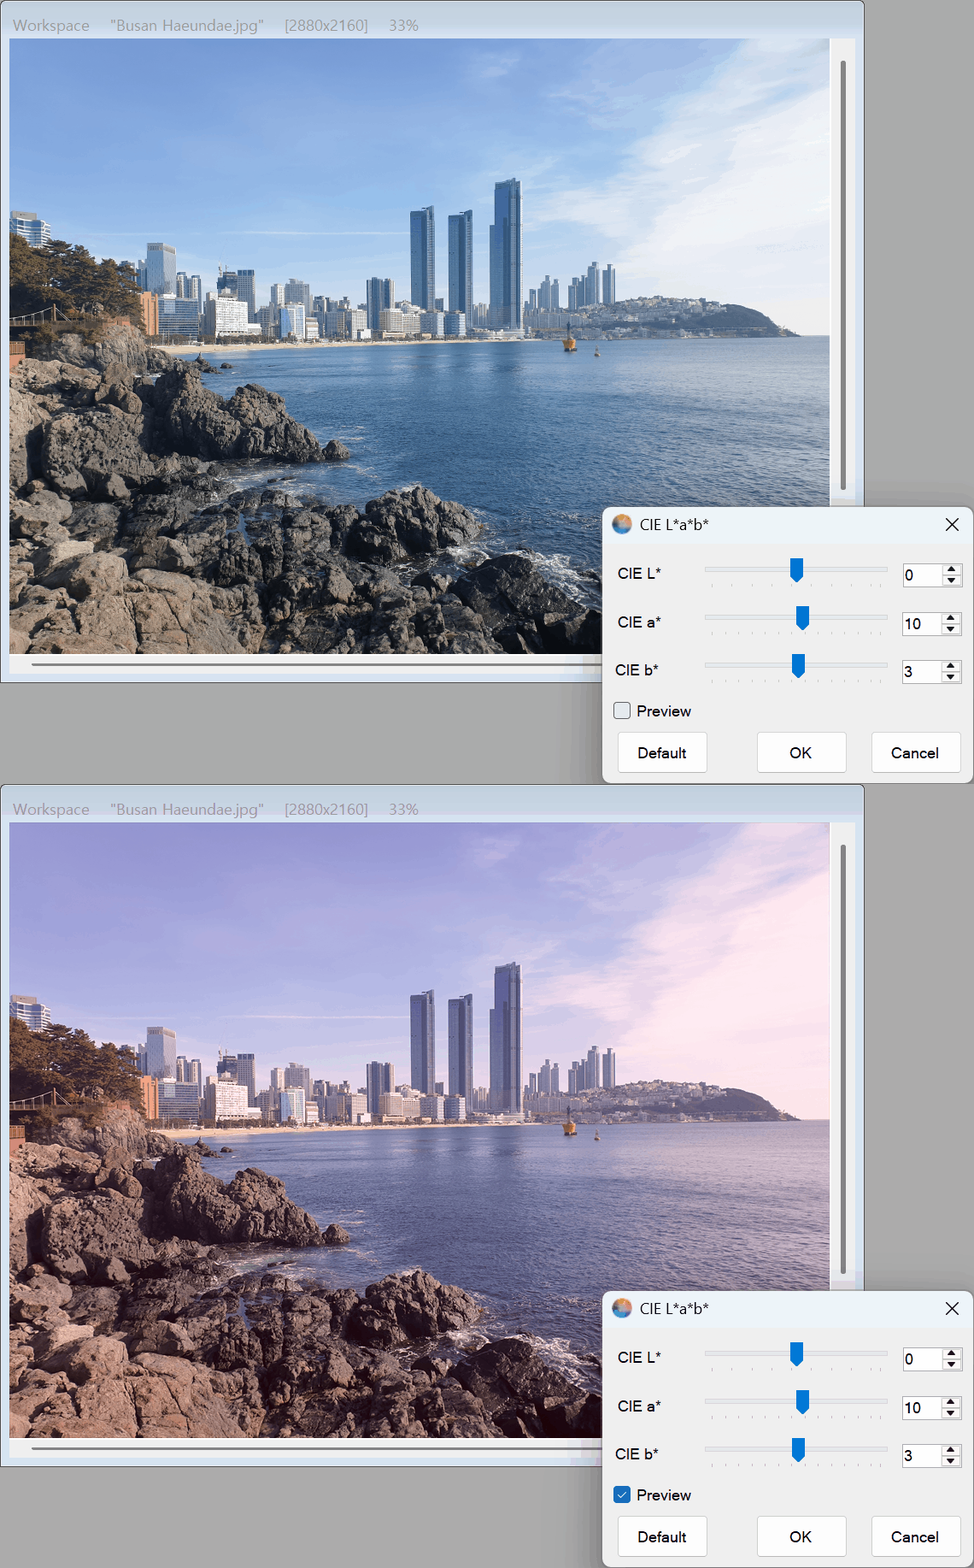
💡 Key Features
- Independent Lightness Control (L): The “L” stands for Lightness. Adjusting this slider lets you make your image brighter or darker without changing the intensity or hue of the colors. It is perfect for fixing underexposed photos safely.
- Green-Magenta Correction (a): The “a” slider controls the balance between green and magenta. If your indoor photos have an unnatural greenish tint from fluorescent lights, slightly adjusting this slider will neutralize the color cast instantly.
- Blue-Yellow Correction (b): The “b” slider controls the balance between blue and yellow. This is incredibly useful for adjusting the “warmth” of a photo, allowing you to fix overly blue shadows or tone down a harsh yellow sunset.
- Real-Time Preview Engine: PhenoCapture AI’s highly optimized engine ensures that as you move the sliders, your image updates in real time without any lag, letting you find the perfect color balance effortlessly.
- One-Click Reset: If you are not satisfied with your adjustments, a simple click on the Default button instantly resets all sliders back to zero, giving you a fresh start.
🛠️ How to Use CIE Lab* Adjustment
Achieving professional color correction is easy when you break it down into three simple sliders. Here is how to use them:
Step 1: Fix the Lighting First (L)
Start with the CIE L (Lightness) slider. Drag it to the right to rescue details from dark areas, or to the left to darken overly bright spots. Notice how your colors remain rich and natural even as the lighting changes!
Step 2: Neutralize Color Tints (a & b)
If the colors look slightly “off” due to bad lighting, use the color sliders to balance them:
- If the image looks too green or too pink, gently adjust the CIE a slider until the tint disappears.
- If the image looks too cold (blue) or too warm (yellow/orange), adjust the CIE b slider to restore a neutral, natural look.
Step 3: Compare and Apply
Make sure the Preview checkbox is ticked so you can see your adjustments live. Once you are happy with the vibrant, corrected result, click the OK button to apply the changes to your main workspace.
By leveraging the power of the CIE Lab* adjustment tool, you can achieve studio-quality photo corrections and document enhancements in just a few clicks!