🖨️ A Complete Guide to Print Image
PhenoCapture AI’s Print Image tool gives you absolute control over how your images look on paper. Whether you need to print a microscopic scan at an exact 1:1 physical scale for accurate measurement, or you want to perfectly stretch a large photograph to fill a standard sheet of paper, this tool ensures flawless, high-quality printing every time.
Here is everything you need to know to get the perfect physical copy of your image.
💡 Key Features
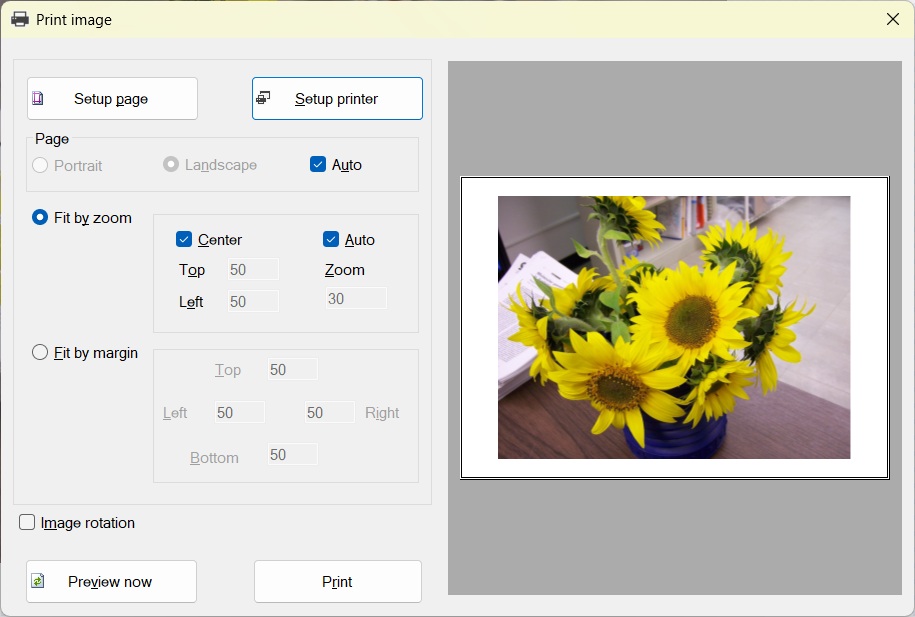
- Smart Auto-Rotation: Never waste paper printing a wide image on a tall page again! By enabling Auto-Rotation, the software automatically detects your image’s proportions and switches the paper orientation (Portrait or Landscape) to provide the best possible fit.
- Dual Sizing Modes: You have total control over the scale of your print:
- Fit by Margin (Fit to Page): Automatically scales and centers your image to perfectly fill the paper based on the margins you set.
- Fit by Zoom (Actual Size): Allows you to print the image at a specific physical scale, auto-zoom, or perfectly center it on the page without stretching.
- Safe Real-Time Preview: The built-in preview window updates instantly as you change margins or zoom levels, showing you exactly how the final print will look. It also features a smart safety check that prevents software crashes if your printer becomes suddenly disconnected!
- Manual Image Rotation: Need your image to face a specific direction on the paper? You can easily rotate the image 90 degrees clockwise or counter-clockwise just for the print, leaving your original saved file completely untouched.
🛠️ How to Use the Print Image Tool
Getting the perfect printout takes just a few simple steps:
Step 1: Printer and Page Setup
When you open the Print Image tool, click Print Setup to select your target printer, and Page Setup to choose your paper size (like A4 or Letter). The live preview will instantly update to match your paper size.
Step 2: Choose Your Orientation
Decide how the paper should be held. You can manually select Portrait (tall) or Landscape (wide). For the easiest experience, simply check the Auto Page Rotation box and let the software decide the best fit for your specific image!
Step 3: Select Your Sizing Mode
Choose how you want the image to fill the paper:
- To fill the whole page: Select Fit to Page (By Margin). Enter your desired Top, Bottom, Left, and Right margins (e.g., 50), and the software will stretch the image as large as possible without cutting off any edges.
- To control the exact size: Select Actual Size (By Zoom). You can check Auto Zoom, manually type in a zoom percentage, or check Center to place the image perfectly in the middle of the page.
Step 4: Preview and Print
Look at the preview window to double-check your margins and orientation. If everything looks perfect, click the Print button! The software will safely communicate with your printer and deliver a crisp, high-quality physical copy.
With the Print Image tool, turning your digital workspace into perfectly scaled physical documents is completely effortless!