🖨️ Guide to Acquiring Images from a Scanner
PhenoCapture AI’s Acquire Image from Scanner tool allows you to bypass saving files to your hard drive by scanning documents and images directly into your workspace. By communicating seamlessly with your connected WIA (Windows Image Acquisition) or TWAIN scanner devices, this feature streamlines your workflow from physical document straight to digital analysis.
💡 Key Features
- Smart Device Detection: Before initiating a scan, the software intelligently checks your PC for connected scanner devices. If nothing is detected, it immediately alerts you to check your connection, preventing the software from freezing or throwing unhandled system errors.
- Direct Workspace Import: Once a scan is completed, the image is instantly loaded onto your main drawing board, ready for measurement and analysis.
- Automatic Image Resizing: High-resolution scans can sometimes generate files that are too large for optimal processing. The tool automatically checks the incoming image size and seamlessly resizes it if necessary to maintain a smooth, lag-free user experience.
- Safe Cancellation & Undo Integration: If you change your mind, you can safely click Cancel on the scanner dialog, and PhenoCapture AI will smoothly abort the process. Every successful scan is also automatically logged in your Undo history, allowing you to quickly revert your workspace if you decide to rescan.
- Clear User Feedback: Receive clear, helpful pop-up messages if no scanner is found, if an operation is cancelled, or if a hardware error occurs.
🛠️ How to Acquire a Scanned Image
Importing an image from your physical scanner takes just a few simple steps:
Step 1: Ensure Your Scanner is Connected
Make sure your WIA or TWAIN-compatible scanner is plugged into your PC, turned on, and properly recognized by Windows.
Step 2: Launch the Scan Tool
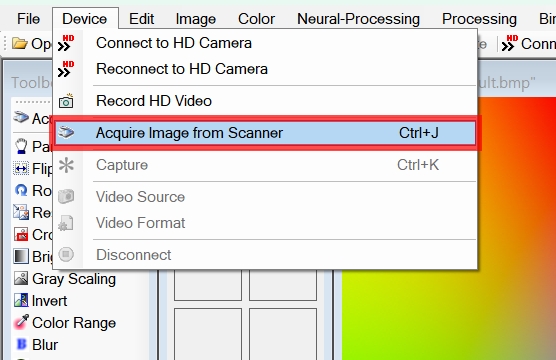
Click on the appropriate menu option (e.g., Take Image from WIA Device or Acquire Image).
- Note: PhenoCapture AI will perform a quick background check to ensure your scanner is actively connected. If not, it will display a friendly reminder to check your cables.
Step 3: Complete the Scan
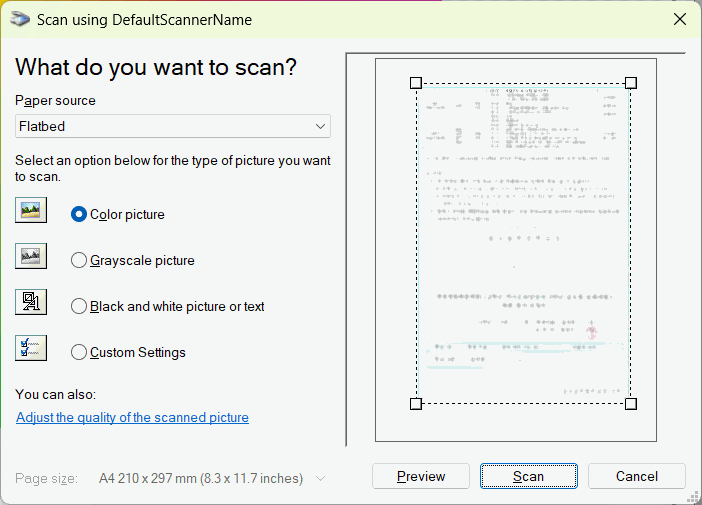
Your scanner’s native scanning window will appear on the screen. Adjust your scanning preferences (such as color mode or DPI) as needed, and execute the scan.
Step 4: Ready for Analysis!
Once the scan finishes, the resulting image will automatically populate your main workspace. If the scanned file was excessively large, the software will have already optimized its size for you. You are now ready to begin your image analysis!