A Comprehensive Guide to Adaptive Binarization in PhenoCapture AI
Whether you are digitizing a text document with heavy shadows, enhancing unevenly lit photographs, or extracting graphics for a design project, bad lighting can make it incredibly difficult to cleanly separate your subject from the background. PhenoCapture AI solves this everyday problem with its powerful Adaptive Binarization tool.
Instead of applying a single global brightness setting to the entire image, Adaptive Binarization dynamically calculates the perfect threshold for small, localized regions. This ensures that every detail—like faded text or intricate photo elements—is captured accurately, completely neutralizing lighting inconsistencies across the page or canvas.
In this post, we will explore the core features of PhenoCapture AI’s Adaptive Binarization tool and how to use it to get perfectly clean images every time.
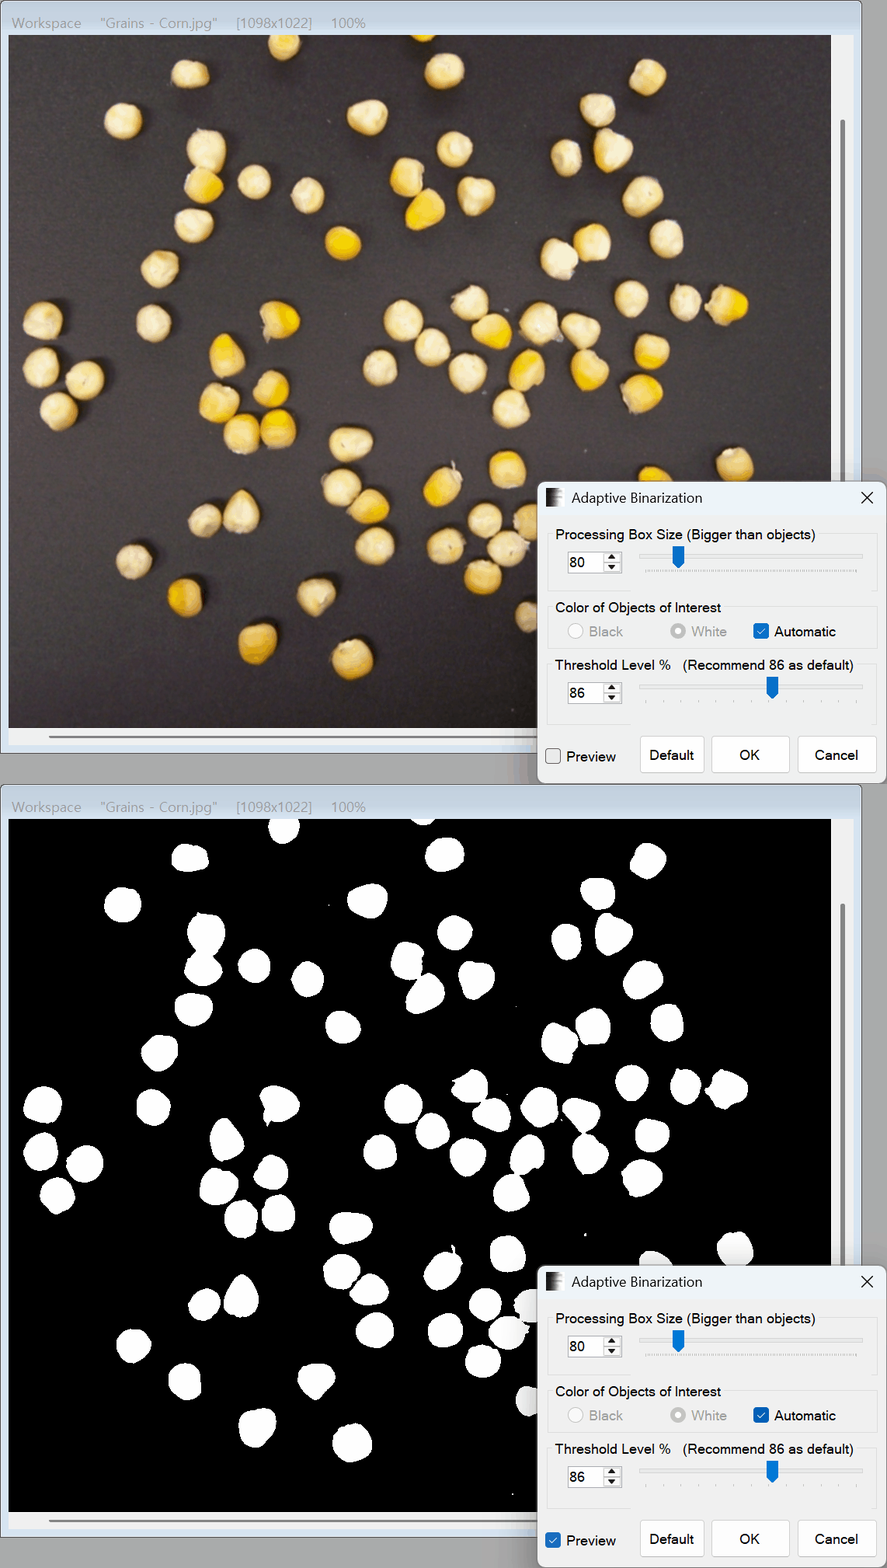
💡 Key Features
PhenoCapture AI’s Adaptive Binarization isn’t just accurate; it is engineered for maximum speed and user convenience, making professional-grade image processing accessible to everyone.
- Ultra-Fast Real-Time Preview: Powered by a highly optimized parallel processing engine, you can see the results instantaneously as you move the sliders. The preview overlays perfectly on your workspace without permanently altering the original image data.
- Smart Auto-Detection (Automatic Mode): Not sure if your subject is darker or lighter than the background? When the ‘Automatic’ checkbox is enabled, PhenoCapture AI intelligently calculates the colors of your selected area to automatically determine the object’s color type (White or Black object).
- Zoom-Aware Precision Processing: To prevent lag when working with high-resolution photos or large document scans, the engine dynamically adjusts the preview if you zoom out. This means you always get a smooth, accurate preview at any zoom level, complete with seamless panning support.
- Seamless Mask Integration: The binarization process works perfectly with your selection tools. It strictly respects the boundaries of your selected regions, saving processing power and instantly cleaning up only the areas you care about.
🛠️ How to Use Adaptive Binarization
Achieving a perfectly crisp, clean image takes only a few clicks. Here is a step-by-step guide:
Step 1: Enable the Live Preview
First, open the Adaptive Binarization window and ensure the [Preview] checkbox is ticked. This allows you to monitor exactly how your parameter changes affect your photo or document in real-time.
Step 2: Adjust Box Size and Threshold Level
Use the intuitive sliders or input exact numbers to fine-tune your results:
- Box Size: This determines the size of the local neighborhood used to calculate the lighting changes. A larger box size handles gradual shadows (like a folded page), while a smaller size captures finer, highly localized details (like small text or textures).
- Threshold Level: This adjusts the sensitivity of the separation between your subject and the background.
(Tip: If you ever want to start over, simply click the [Default] button to reset the parameters to PhenoCapture AI’s highly optimized default values: Box Size 80, Threshold Level 86, and Automatic Mode ON.)
Step 3: Set Object Color (Automatic or Manual)
By default, leave the Automatic box checked. PhenoCapture AI will automatically scan the region and detect whether you are trying to isolate a dark object (like black text on white paper) or a light object. If you need strict manual control, simply uncheck ‘Automatic’ and choose the correct radio button for your specific image.
Step 4: Apply the Binarization
Once the preview perfectly isolates your target subject or text, click [OK]. The highly optimized algorithm will process the full-resolution image instantly and apply the clean, binarized result to your main workspace.
With PhenoCapture AI’s Adaptive Binarization, dealing with poor illumination is no longer a headache. Experience the speed of professional processing and the convenience of smart auto-detection in your everyday image editing!