🎨 Gray to Color: Bring Grayscale Images to Life (Color Map)
PhenoCapture AI’s Gray to Color tool allows you to instantly transform standard black-and-white or grayscale images into vibrant, color-mapped visuals. By applying specific color gradients (often called “heatmaps” or “pseudocolors”), you can make subtle details and textures stand out beautifully.
Whether you want to stylize a photograph, create a thermal-camera effect, or simply highlight specific intensity levels in a scanned document, this tool makes the process incredibly intuitive and visually stunning.
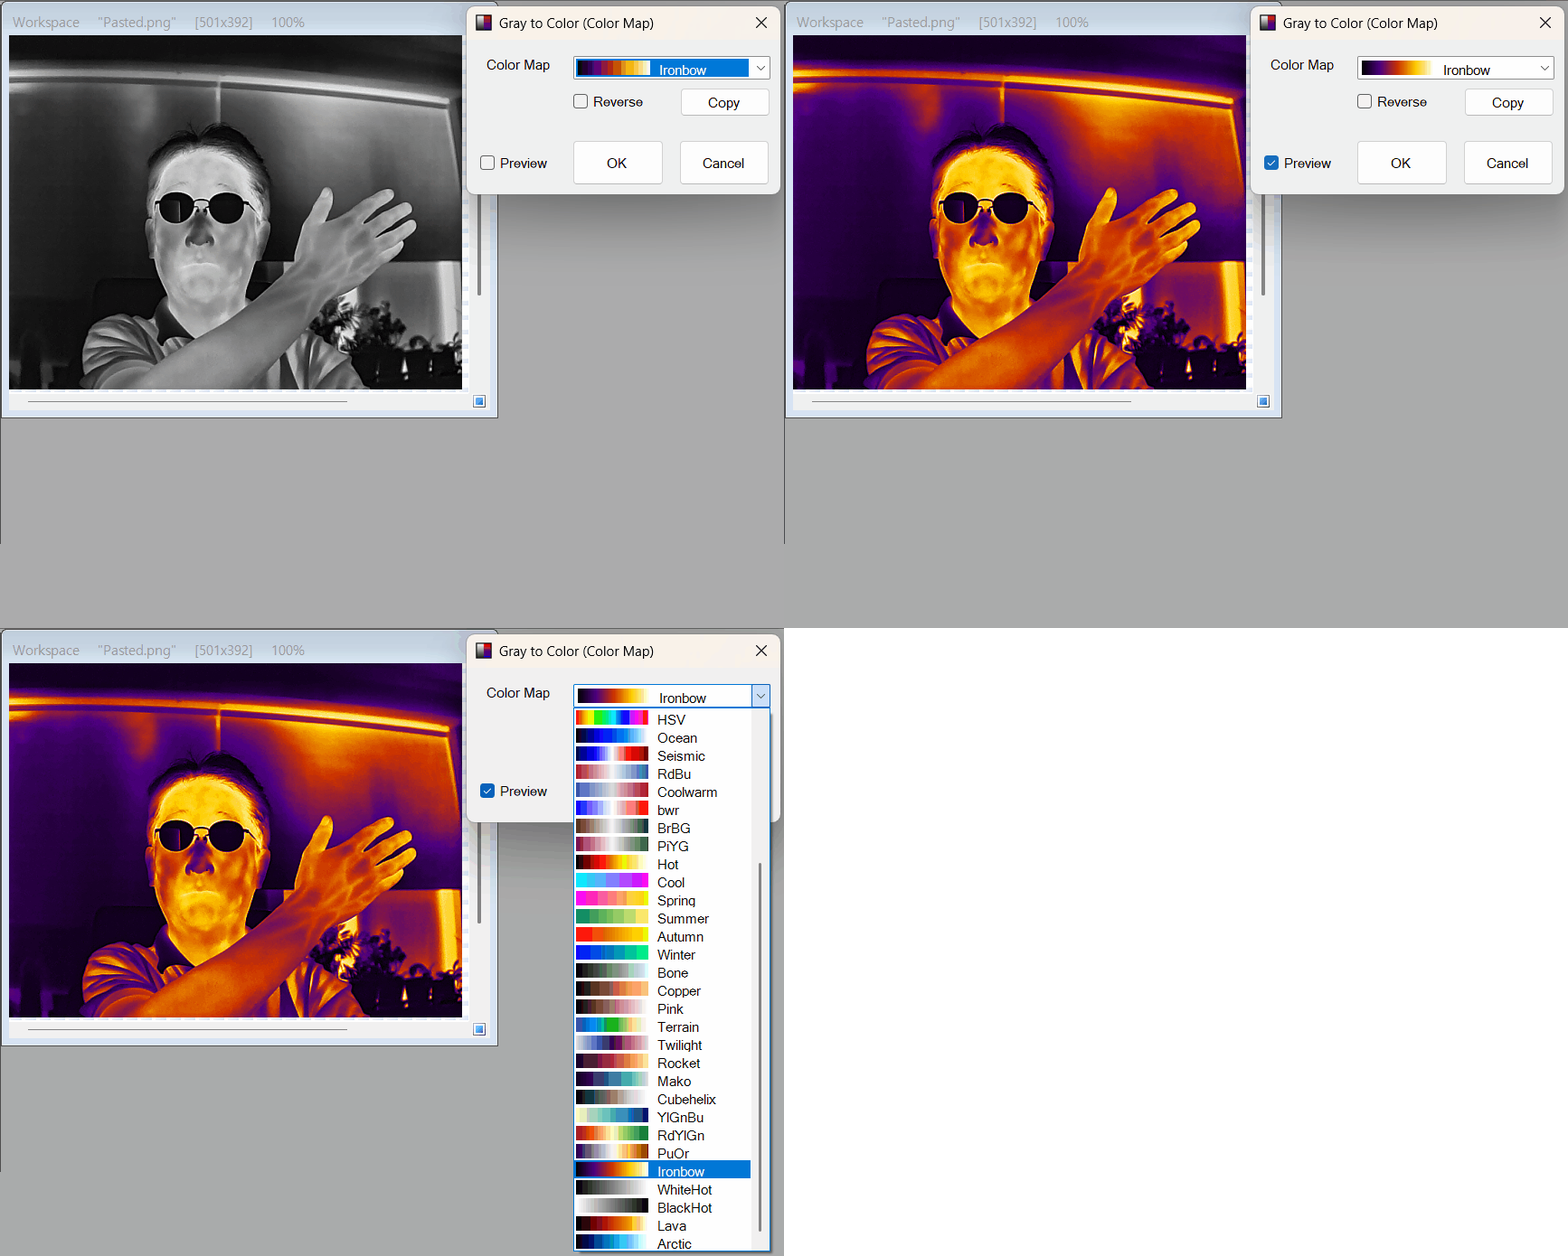
Note: There is some loss of image quality during the conversion to an animated GIF.
💡 Key Features
- Diverse Color Maps: Choose from a wide variety of built-in color gradients (such as the popular “Spectral” map). The dropdown menu provides a visual preview of the color bar so you know exactly what the gradient looks like before applying it.
- Real-Time Preview: Watch your grayscale image transform instantly as you select different color maps. The live preview engine ensures you can experiment freely without permanently changing your original image.
- Reverse Gradient Option: Not quite getting the look you want? Simply check the “Reverse” box to instantly flip the direction of the color gradient, mapping darks to bright colors and vice versa.
- Export Color Scales: If you are creating a report or presentation, you can click the “Copy” button to instantly copy a high-resolution version of the selected color gradient bar right to your clipboard. This is perfect for adding a color legend to your documents!
- Selective Coloring (Mask Support): You do not have to colorize the entire image. If you have a specific area selected, the color map will only apply to that targeted region, leaving the rest of your image perfectly intact.
🛠️ How to Use the Tool
Colorizing your grayscale images only takes a few clicks:
Step 1: Choose Your Color Map
Open the Gray to Color tool and click on the dropdown menu. You will see a list of color gradients alongside a visual preview of each one. Select the map that best fits the aesthetic or highlighting effect you are trying to achieve.
Step 2: Adjust and Preview
Make sure the Preview box is checked so you can see the effect applied to your image in real-time. If you want to invert how the colors are applied to the light and dark areas of your image, simply toggle the Reverse checkbox.
Step 3: Apply and Export
Once you are happy with the preview, click OK to finalize the colorization. If you need to show others what your color scale represents, click the Copy button before closing the tool to grab a high-quality image of the gradient bar for your notes or presentations.
With the Gray to Color tool, turning flat, monochromatic pictures into eye-catching, vibrant visuals is easier than ever. Give it a try and see what hidden details you can bring to light!