🎨 A Complete Guide to Merging Channels
PhenoCapture AI’s Merge Channels tool is an essential feature for reconstructing full-color images from individual grayscale channel images. Whether you are a scientist combining red, green, and blue fluorescence microscopy shots, or a photographer experimenting with advanced color spaces, this tool seamlessly composites your separate images into one stunning, unified picture.
Here is everything you need to know about combining your image channels perfectly.
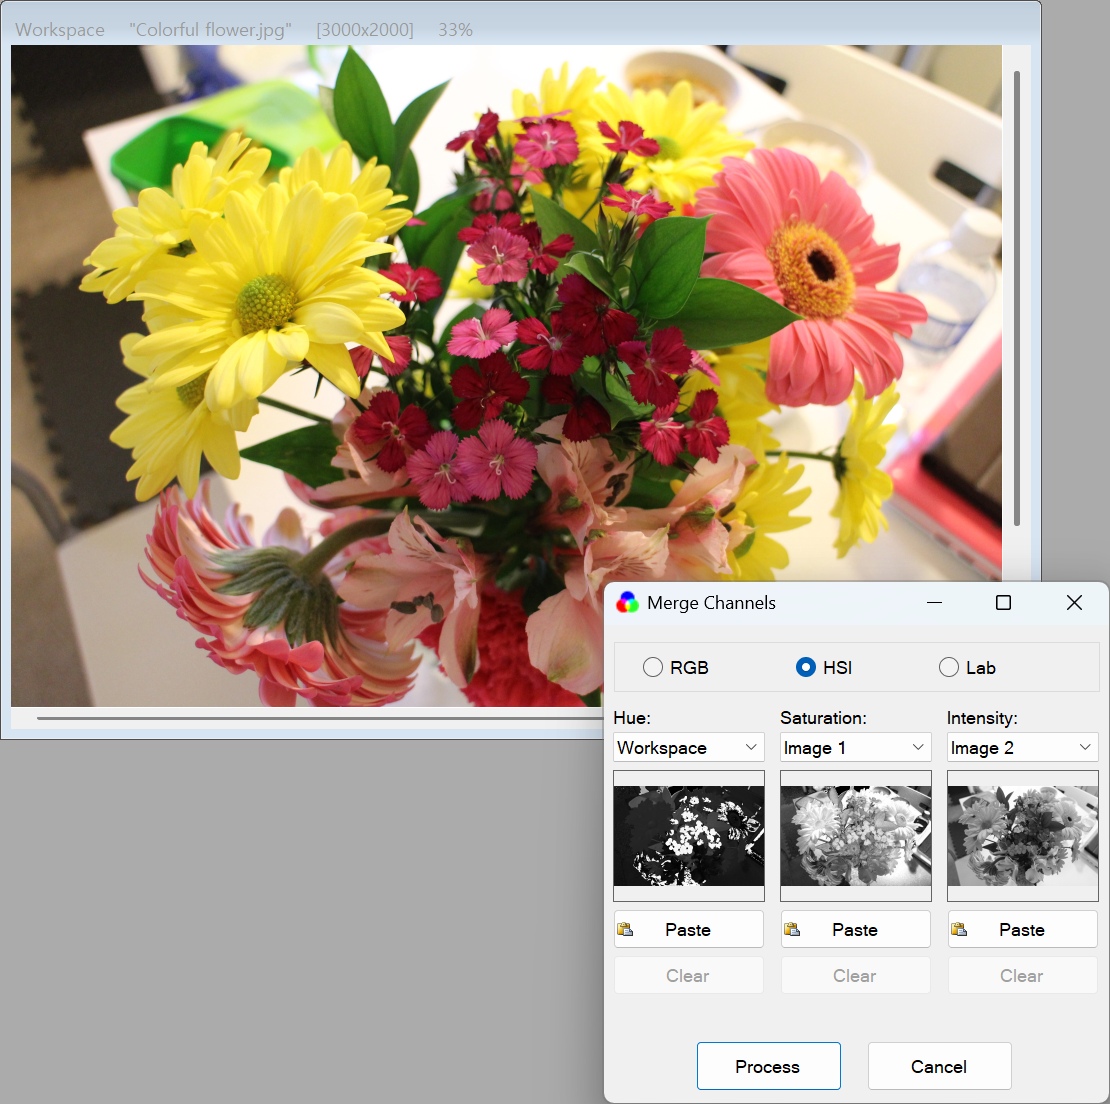
💡 Key Features
- Multiple Color Spaces: You are not limited to standard colors! You can merge images using traditional RGB (Red, Green, Blue), or explore advanced color models like HSI (Hue, Saturation, Intensity) and LAB (Lightness, Green-Red, Blue-Yellow) for specialized analysis.
- Smart Image Validation: To prevent distorted results, the tool automatically checks your selected images. It ensures that all provided images are the exact same size before allowing you to merge them, keeping your workflow error-free.
- Flexible Channel Requirements: If you are working in RGB, you don’t even need all three images—you can merge just one or two channels and leave the rest blank. (Note: HSI and LAB modes require all three channels to build a complete image).
- Universal Drag & Drop: Loading your images is incredibly fast. You can drag and drop files straight from your computer, paste them directly from your clipboard, or select them from the built-in image buffers.
🛠️ How to Use the Merge Channels Tool
Combining your separated images takes just a few intuitive steps:
Step 1: Choose Your Color Space
Select the color model you want to use for the merge by clicking the RGB, HSI, or LAB radio button. The labels above the image boxes will automatically update to show you which channel belongs in which box.
Step 2: Load Your Images
Add your grayscale images into the designated boxes (e.g., put your Red channel image into the Red box). You can load images in three different ways:
- Dropdown Menu: Select an image currently open in your Workspace or saved in your Image Buffers.
- Drag & Drop: Drag an image file straight from your desktop and drop it into the box.
- Paste: Click the Paste button to insert an image you just copied to your clipboard.
(Tip: If you make a mistake, just click the Clear button to empty the box and try again!)
Step 3: Check for Errors
The tool will silently check your images. If they are different sizes, or if you are missing a required image for HSI/LAB modes, a warning message will appear. Ensure all images match perfectly!
Step 4: Merge!
Once your images are loaded and verified, simply click OK. The software will instantly blend your channels together and display the newly reconstructed full-color image in your main workspace!
With the Merge Channels tool, turning fragmented scientific data or separated color layers into beautiful, cohesive images is completely effortless!