🔲 A Complete Guide to the Mosaic Filter
PhenoCapture AI’s Mosaic tool is the perfect feature for protecting privacy, hiding sensitive information, or adding a creative pixelated effect to your photos. Whether you need to obscure a face, redact a license plate, or pixelate an entire background, this tool provides instant, highly customizable results.
Here is everything you need to know about using the Mosaic filter effectively.
💡 Key Features
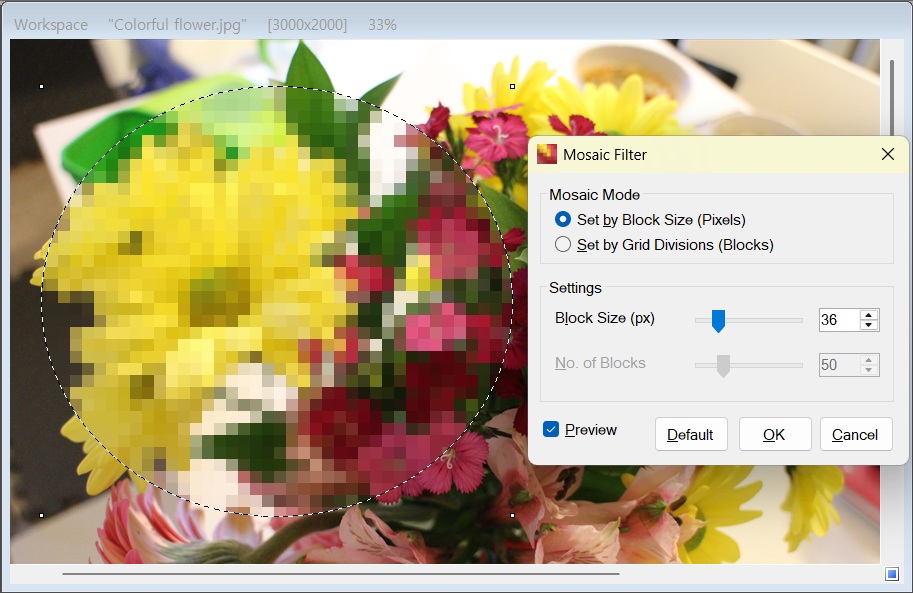
- Two Smart Modes: Choose exactly how you want to pixelate your image. You can define the absolute width of each pixel block (By Pixel Size) or seamlessly divide your image into a specific number of grid squares (By Grid Count).
- Zero-Lag Real-Time Preview: The highly optimized rendering engine actively adjusts to your zoom level. It allows you to tweak the mosaic intensity and see the exact, accurate results instantly without any freezing or loading delays.
- Targeted Privacy: Combine the Mosaic tool with the built-in selection tools to pixelate only specific areas of your image (like documents or faces) while leaving the rest of the photo perfectly clear.
🛠️ How to Use the Mosaic Tool
Hiding sensitive details or adding pixel effects takes just a few intuitive steps:
Step 1: Make a Selection (Optional)
If you only want to redact a specific part of your photo, use the selection tools (like the Rectangle or Circle tool) to highlight that area first. If you want to pixelate the entire image, simply leave the workspace unselected.
Step 2: Choose Your Mosaic Mode
Open the Mosaic tool and ensure the Preview box is checked. Then, select your preferred control mode:
- By Pixel Size: Controls the exact size of the mosaic blocks. A value of 20 means each block will be 20×20 pixels.
- By Grid Count: Divides the image into a set number of blocks. A value of 50 means the image will be split into a 50×50 grid, regardless of the original image size.
Step 3: Adjust the Intensity
Grab the slider or use the number box to increase or decrease the mosaic level.
- A larger number creates bigger, chunkier blocks (ideal for completely hiding identity or text).
- A smaller number creates finer, tighter blocks (ideal for mild obscuring or artistic pixel art).
Step 4: Apply the Filter
Once you are completely satisfied with how the preview looks, simply click OK. The mosaic effect will be instantly applied to your image!
(Tip: If you want to reset the sliders to a balanced starting point, just click the Default button at any time.)