🎞️ A Complete Guide to Quick Animation
PhenoCapture AI’s Quick Animation tool makes it incredibly easy to bring your still images to life. Whether you want to create a stunning “before-and-after” comparison, a short time-lapse sequence, or a looping presentation graphic, this tool seamlessly merges your photos into a high-quality Animated GIF.
Here is everything you need to know to start animating your image sequences.
💡 Key Features
- Multi-Frame Support: Seamlessly link up to 5 individual image frames together to create your perfect looping animation.
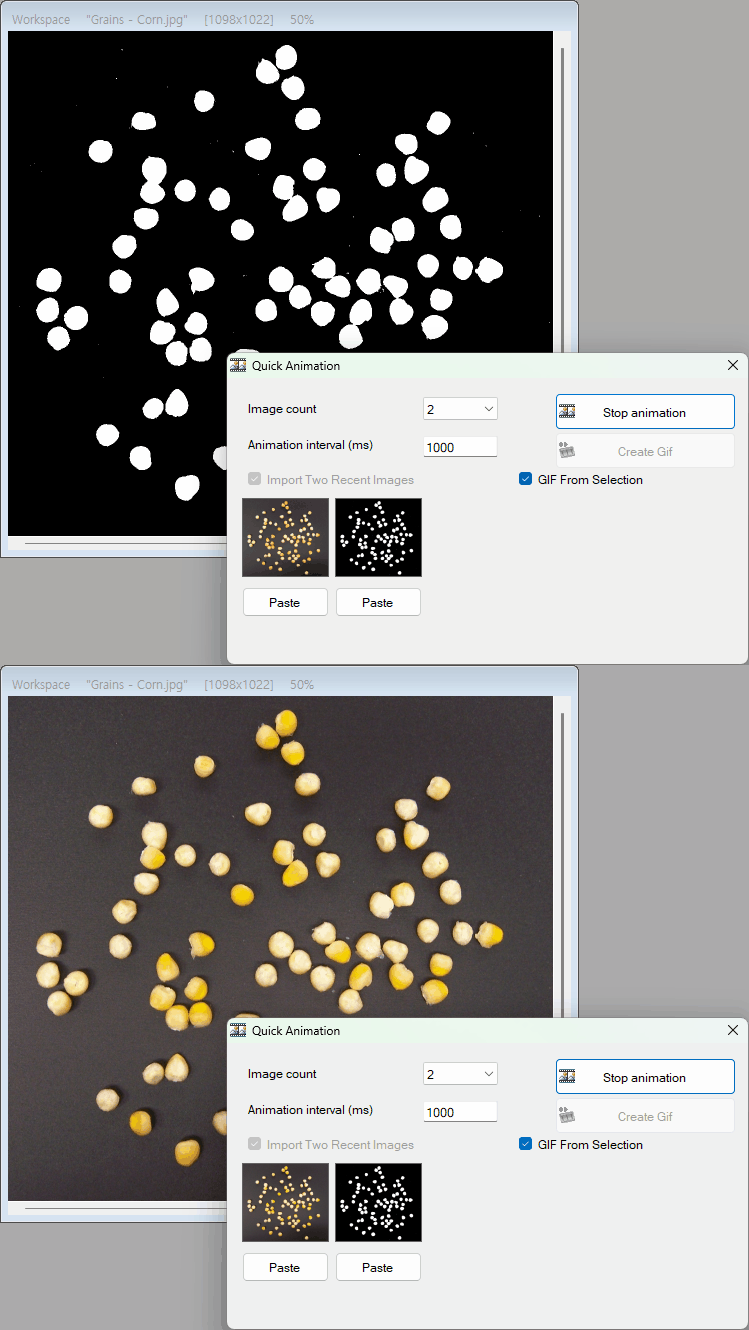
- Flexible Image Loading: You have total freedom in how you add frames. You can drag and drop images into the slots, paste them directly from your clipboard, or automatically import the last two images you worked on for an instant before-and-after effect!
- Real-Time Workspace Preview: You don’t have to guess what your final GIF will look like. Hit the Start button to watch your animation play in real-time directly on your main workspace, allowing you to test different playback speeds.
- Smart Regional Cropping: Want to focus on a specific detail? Draw a selection rectangle on your workspace, and the tool will automatically crop every single frame to that exact boundary when generating your final GIF, ensuring a perfectly framed animation.
🛠️ How to Use Quick Animation
Creating your animated GIF takes just a few simple steps:
Step 1: Choose Your Frame Count
Open the Quick Animation tool and use the dropdown menu to select how many images (between 2 and 5) you want to include in your animation.
Step 2: Load Your Images
Fill your frame slots! You have three easy ways to do this:
- Drag and Drop image files straight from your computer into the empty preview boxes.
- Copy an image from anywhere and click the Paste button under a specific box.
- If you are making a 2-frame animation, simply check the Import Last Two Images box to automatically grab the most recent images from your workspace history.
Step 3: Adjust the Speed
Set your animation speed by typing a number into the Interval box. This number is in milliseconds, meaning a value of 1000 equals exactly 1 second per frame. Lower the number for a faster animation, or raise it for a slower, more deliberate transition.
Step 4: Preview the Action
Click the Start animation button. Your main workspace will instantly come to life, looping through your images at your chosen speed. When you are done previewing, click Stop animation.
Step 5: Export as a GIF
Once your animation looks perfect, click Create GIF. Choose where you want to save the file on your computer, and the software will instantly encode and save your new animated masterpiece!
(Tip: To create a GIF, all images must be the exact same size. If they aren’t, simply use the selection tool to draw a box around the area you want to keep, and the software will intelligently crop them all to match perfectly!)
With the Quick Animation tool, turning static photos into dynamic, shareable GIFs is fast, fun, and completely effortless!