Mastering Brightness and Contrast in PhenoCapture AI
Whether you are trying to rescue an underexposed photograph, make the text on a scanned document easier to read, or simply add a bit more punch to a flat image, adjusting the Brightness and Contrast is one of the most essential steps in image editing. PhenoCapture AI makes this process incredibly fast and intuitive.
With its highly optimized real-time preview engine, you can instantly see your adjustments without any frustrating lag, ensuring you get the perfect look every time.
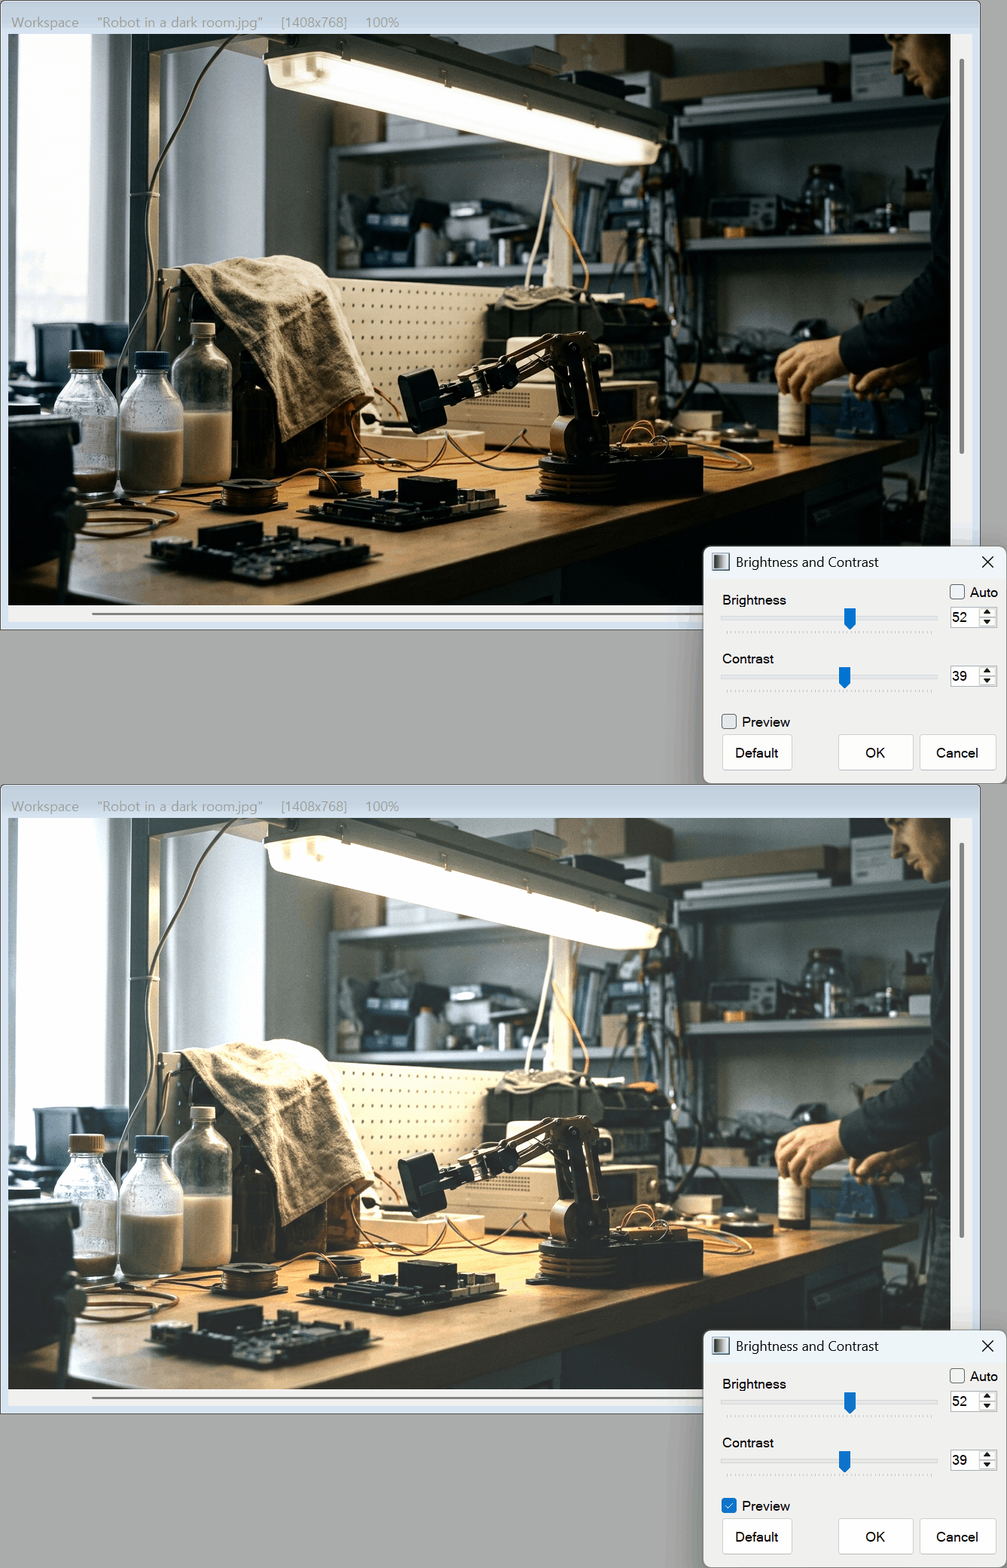
💡 Key Features
- Intuitive Sliders for Instant Results: Smoothly adjust the brightness and contrast using easy-to-use sliders or precise numeric inputs.
- Smart Auto Brightness (Ideal for Scans): Automatically analyzes your image to detect the background tone. When the Auto option is enabled, the brightness dynamically adapts as you change the contrast, perfectly preserving a clean, white background without any manual guesswork.
- Ultra-Fast Real-Time Preview: PhenoCapture AI features an advanced, lag-free preview engine. As you move the sliders, the changes appear on your image instantly. The preview stays perfectly synced even if you are zoomed in or working within a specific selected area (marching ants).
- Selective Adjustments: You do not have to edit the entire image. If you only want to brighten a specific shadowed area or darken a bright spot, simply make a selection first. The adjustments will only apply inside that specific boundary.
- One-Click Reset: Experiment freely! If you change your mind, a single click on the Default button instantly resets both sliders back to zero, returning your image to its original state.
🛠️ How to Adjust Brightness and Contrast
Improving your images takes only a few seconds:
Step 1: Enable the Live Preview
Open the Brightness/Contrast tool. Before making any changes, make sure the Preview checkbox is ticked. This allows you to see the effects of your adjustments directly on your workspace in real-time.
Step 2: Adjust the Brightness (Manual or Auto)
You can control the overall lightness or darkness of your image using either manual adjustments or our smart Auto feature.
- Auto Mode (Highly Recommended for Scanned Documents): Simply check the Auto box. PhenoCapture AI will instantly analyze the background color of your image. The Brightness slider will lock, and the software will automatically calculate and apply the perfect brightness level as you adjust the contrast in the next step. This ensures your paper background stays bright white while the ink gets completely black.
- Manual Adjustment: Leave the Auto box unchecked. Move the Bright slider to the right to brighten up dark, underexposed photos, or to the left to darken images that are washed out.
Step 3: Fine-Tune the Contrast
Use the Contrast slider to adjust the difference between the light and dark areas of your image.
- Increasing the contrast makes the shadows darker and the highlights brighter, giving flat images a vibrant, bold look. (Note: If you enabled the Auto checkbox in Step 2, simply push the contrast up to easily rescue faded text on scanned documents—the background brightness will be maintained automatically!)
- Decreasing the contrast softens the image, which can help reveal details that might be hidden in harsh shadows or extremely bright highlights.
Step 4: Apply Your Adjustments
Because the live preview updates instantly, you will know exactly what the final result will look like as you drag the sliders. Once you are completely satisfied with the visual balance, simply click the [OK] button to apply the changes to your image.
By simply balancing these two sliders—or letting the Auto feature assist you—you can dramatically improve the clarity, depth, and overall quality of any image, photo, or scanned document!