Flawless Lighting with Correct Uneven Illumination
Have you ever taken a photo of a document where one side is covered in a dark shadow, or captured a beautiful scene only to find that the lighting is completely uneven? These common lighting issues can ruin a great photo and make scanned text hard to read. PhenoCapture AI’s Correct Uneven Illumination tool is designed to instantly rescue these images by analyzing and balancing the light across the entire picture.
This intelligent feature maps out the bright and dark areas of your image and gently equalizes them, revealing hidden details in shadows without overexposing the already bright sections. It is an absolute lifesaver for digitizing documents, restoring old photographs, and improving everyday snapshots.
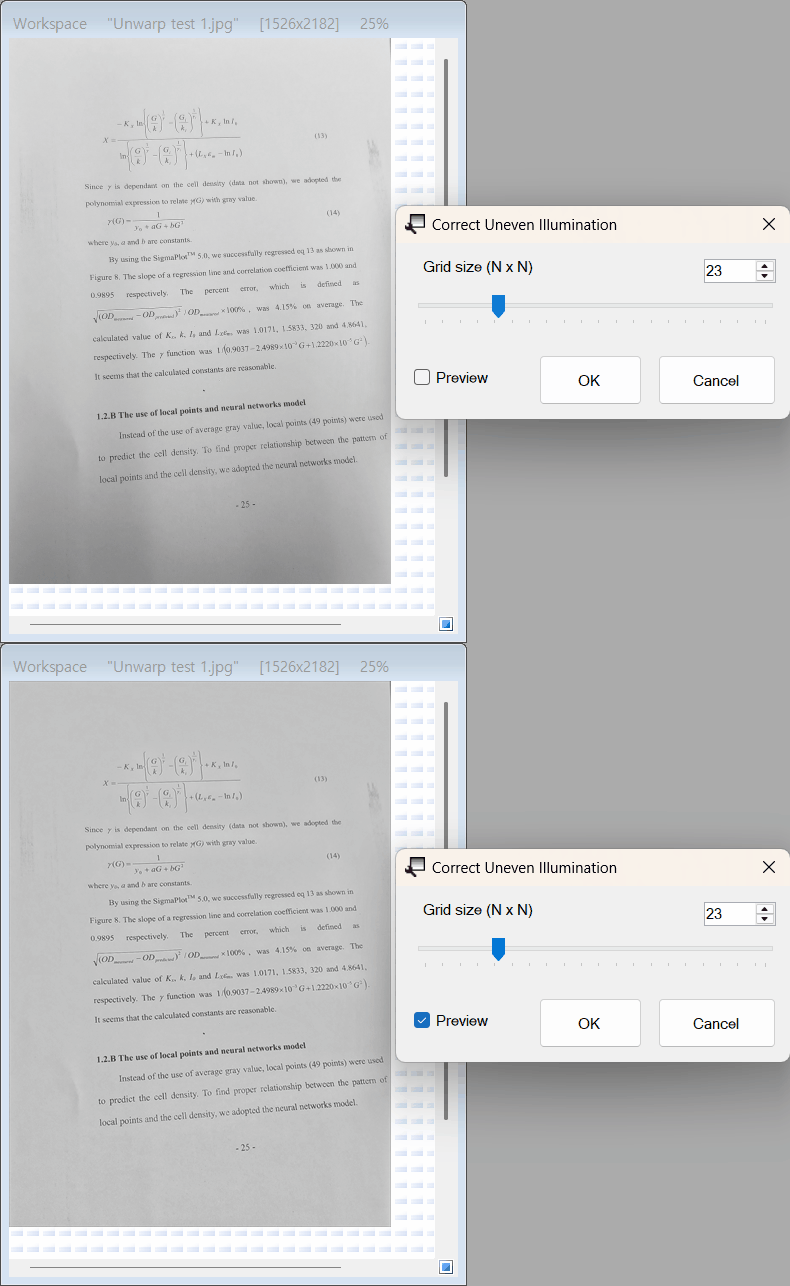
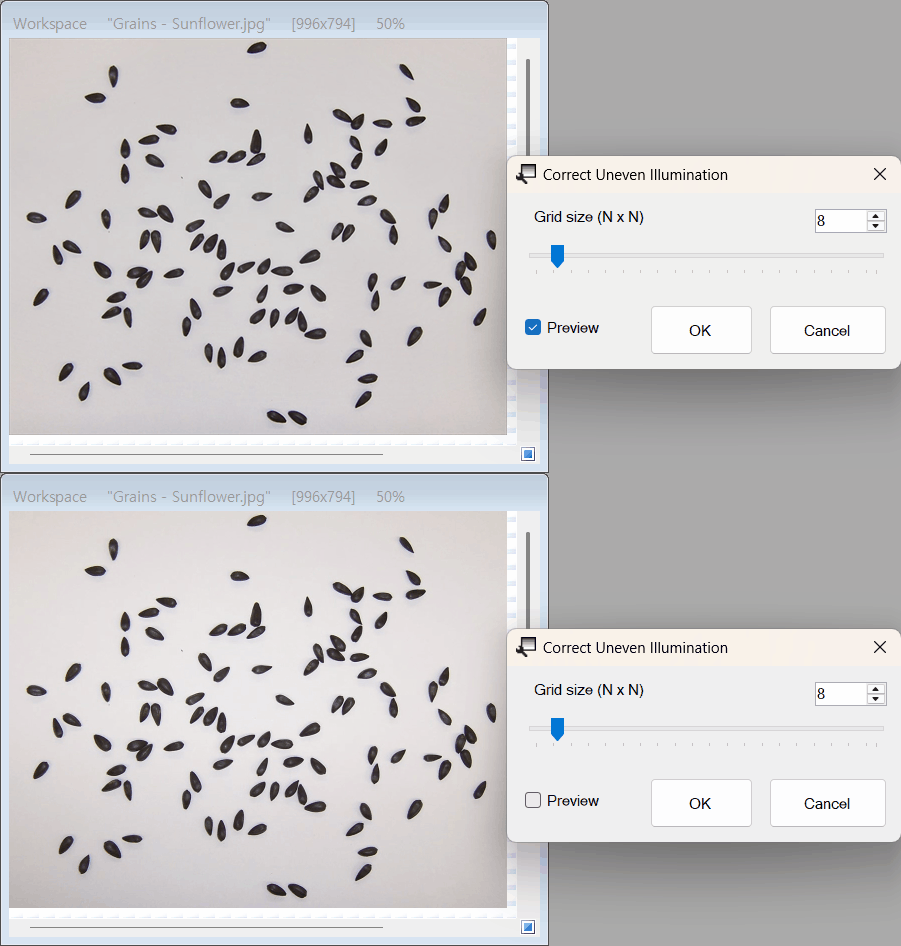
💡 Key Features
- Smart Grid-Based Correction: The tool uses an advanced grid system to create a “map” of your image’s lighting. It intelligently differentiates between actual shadows that need fixing and the natural dark colors of your subjects.
- Customizable Grid Size: You have full control over how the lighting map is generated. Adjusting the Grid Size allows you to fine-tune the correction to perfectly match the scale of the shadows in your specific image.
- Lightning-Fast Real-Time Preview: Thanks to global illumination map caching, the tool calculates the lighting data instantly. As you adjust the grid size, the preview updates in real-time with zero lag, allowing for a seamless editing experience.
- Zoom-Aware Precision: Whether you are zoomed all the way out to view a large landscape or zoomed in close on a specific line of text, the real-time preview remains perfectly synchronized and accurate.
🛠️ How to Use the Correction Tool
Balancing the light in your photos is incredibly straightforward. Just follow these easy steps:
Step 1: Adjust the Grid Size
Start by moving the Grid Size slider.
- Use a smaller grid size if your image has lots of small, localized shadows (like uneven wrinkles on a scanned page).
- Use a larger grid size if there is a broad, gradual change in lighting across the whole photo (like a sunset where one half of the sky is much darker than the other).
Step 2: Check the Real-Time Preview
Make sure the Preview checkbox is enabled. As you adjust the slider or type a number into the box, you will instantly see the shadows lift and the bright spots normalize. You can toggle the preview on and off to compare the corrected lighting with your original image.
Step 3: Apply the Perfect Balance
Once the lighting looks beautifully even and natural across your entire image, simply click the OK button. The balanced result will immediately be applied to your main workspace, ready for saving or further editing.
With the Correct Uneven Illumination tool, you no longer have to worry about perfect lighting when taking a picture or scanning a document. Let PhenoCapture AI do the heavy lifting and bring perfect balance to your images!