🔳 A Complete Guide to Manual Binarization
PhenoCapture AI’s Manual Binarization is the perfect tool for converting your images into pure black and white. Whether you need to crisp up faded text on a scanned document, extract a clean signature from a photograph, or isolate distinct objects for scientific analysis, this tool gives you absolute control over the conversion process.
Here is everything you need to know about setting the perfect black-and-white threshold.
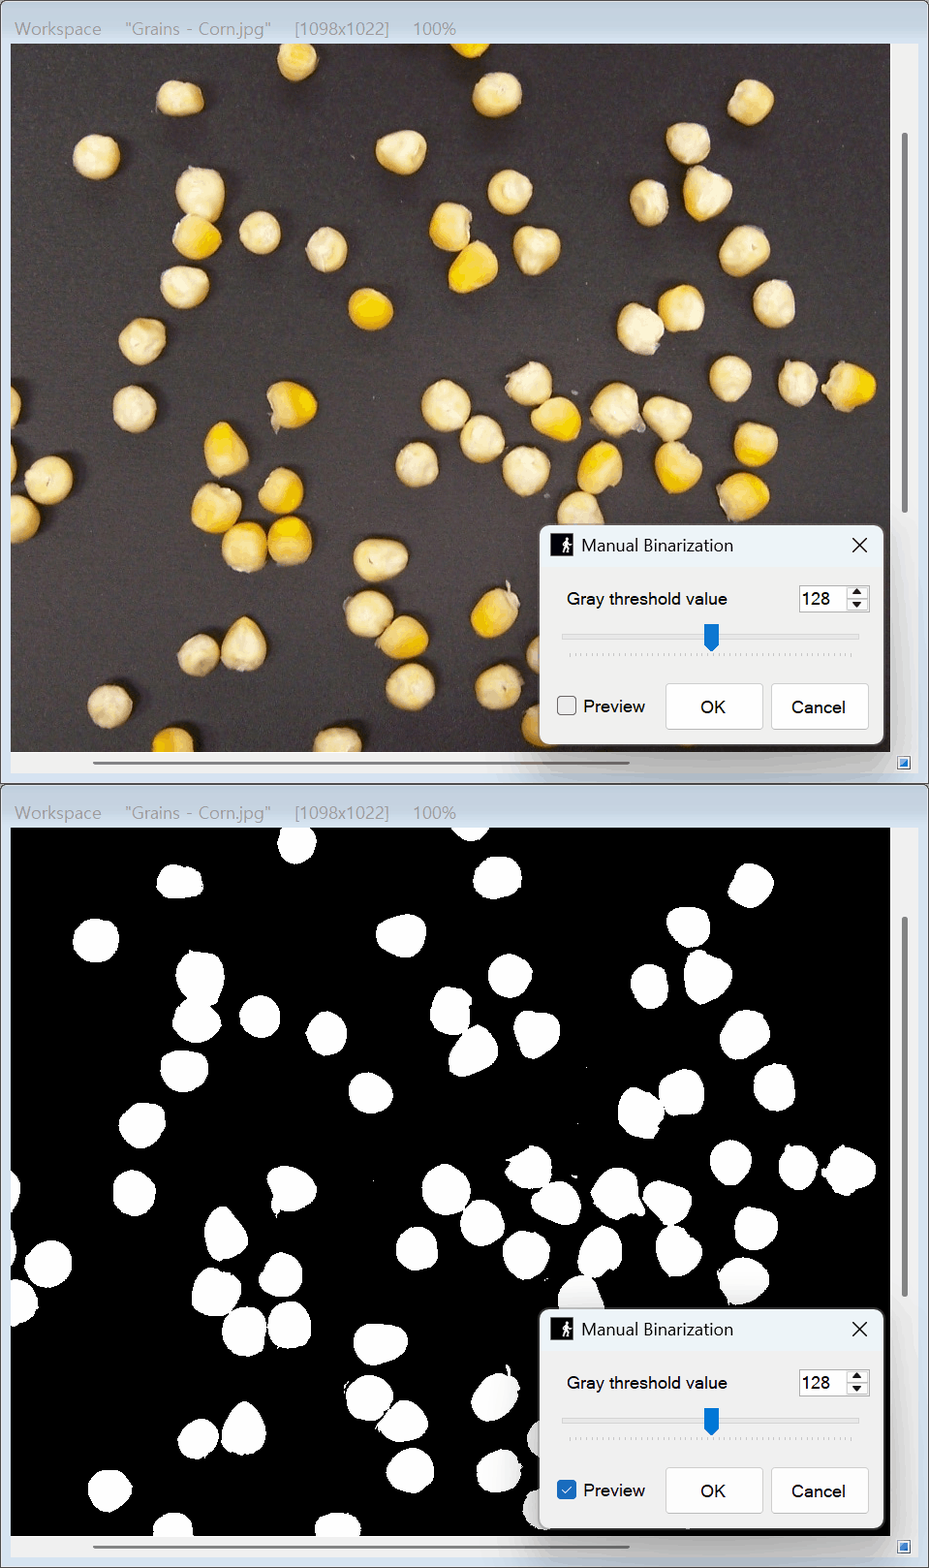
💡 Key Features
- Zero-Lag Real-Time Preview: Watch your image transform instantly as you adjust the settings. The highly optimized rendering engine guarantees a perfectly smooth preview without any freezing, even on high-resolution images.
- Precise Threshold Control: You have the exact power to decide which parts of your image turn black and which turn white. The slider and number pad allow for micro-adjustments to get the exact contrast you need.
- Targeted Selection Support: You don’t have to convert the entire image! Use any of the selection tools to draw a boundary, and the binarization will only apply inside that specific area, leaving the rest of your photo completely untouched.
🛠️ How to Use Manual Binarization
Achieving a clean, high-contrast black-and-white image takes just a few seconds. Follow these simple steps:
Step 1: Enable the Preview
When you open the Manual Binarization tool, make sure the Preview box is checked. This allows you to see exactly how your final image will look in real time before making any permanent changes.
Step 2: Adjust the Threshold Slider
Grab the Threshold slider and move it left or right to adjust the cutoff point for black and white pixels:
- Moving the slider to the left (a lower value) makes the image brighter, turning more pixels white. This is great for erasing dark, muddy backgrounds or shadows.
- Moving the slider to the right (a higher value) makes the image darker, turning more pixels black. This helps bring out faint text, thin lines, or light-colored objects.
Step 3: Apply the Conversion
Once you have found the perfect balance where your subject is clear and the background is clean, simply click OK. The crisp, binarized effect will be instantly applied to your image!
(Tip: If you change your mind while adjusting, you can always click the Cancel button to safely close the tool without altering your original image.)
With the Manual Binarization tool, extracting clear lines, text, and shapes from messy photos is fast, precise, and incredibly easy!