🌊 A Complete Guide to Watershed Segmentation
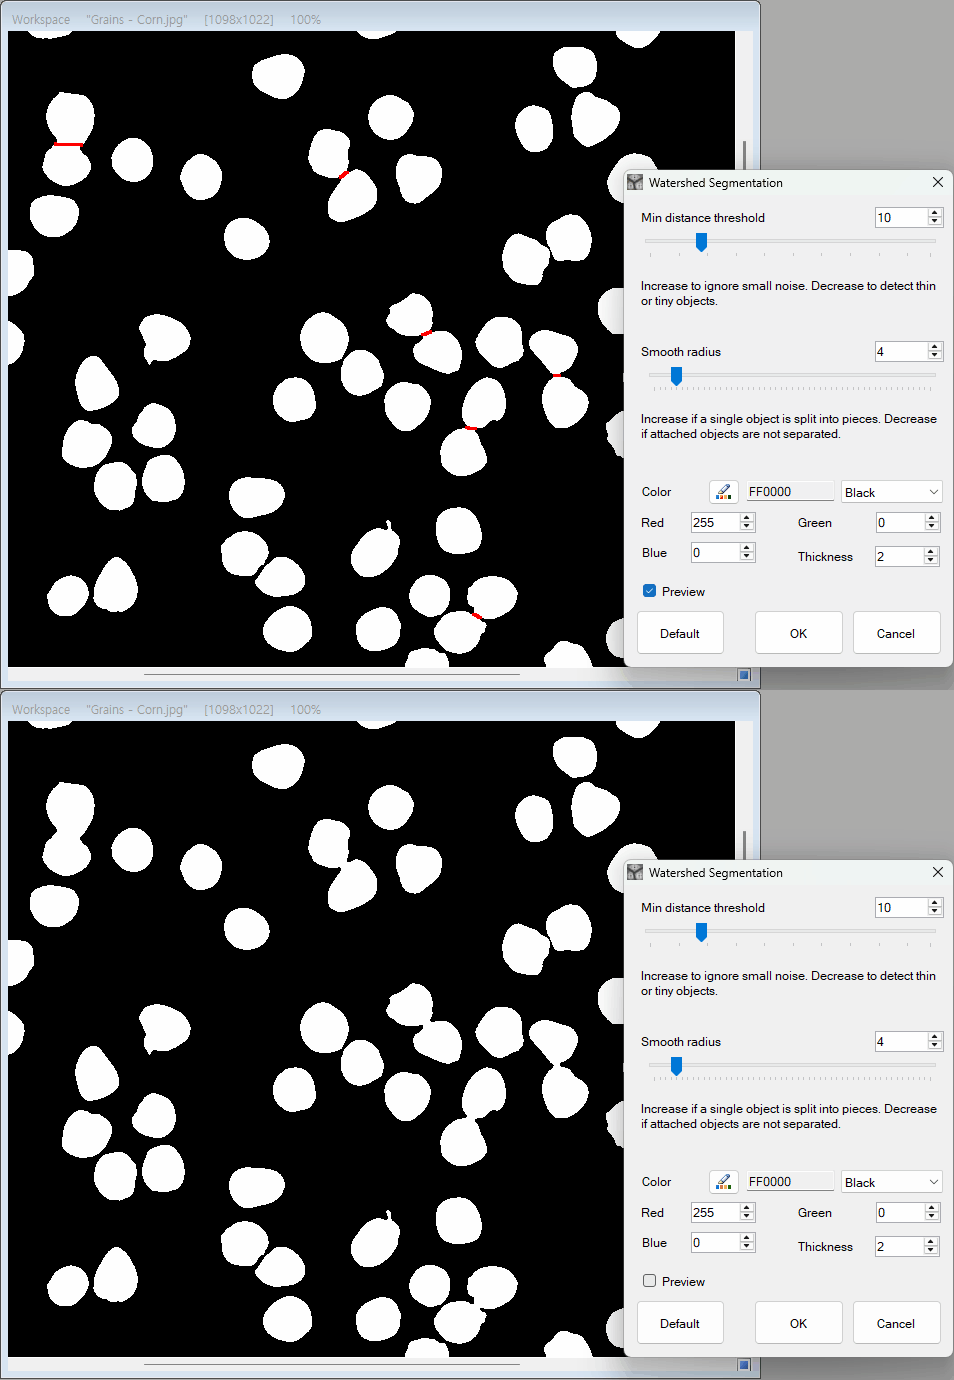
PhenoCapture AI’s Watershed Segmentation is a highly effective tool for automatically separating objects in your images that are touching or overlapping. Whether you are analyzing crowded items, counting clustered cells under a microscope, or simply creating clear visual boundaries between merged shapes, this feature intelligently detects and draws crisp borders to define each individual object.
Here is everything you need to know to easily isolate and outline connected subjects in your photos.
💡 Key Features
- Smart Object Separation: Automatically identifies the centers of overlapping or tightly packed objects and draws precise dividing lines between them.
- Adjustable Detection Sensitivity: Fine-tune how the software interprets separate objects. By adjusting the smoothing and distance controls, you can prevent a single object from being wrongly split into multiple pieces.
- Customizable Boundaries: Make your separated regions stand out perfectly. You can easily change the color and thickness of the boundary lines to contrast with your original image.
- Real-Time Interactive Preview: Instantly see exactly where the boundaries will be drawn as you move the sliders, completely eliminating any guesswork.
🛠️ How to Use Watershed Segmentation
Separating overlapping objects is intuitive and highly visual. Just follow these simple steps:
Step 1: Enable the Real-Time Preview
Open the Watershed Segmentation tool and check the Preview box. This will allow you to see the boundary lines actively drawn over your image as you adjust the settings.
Step 2: Set the Smooth Radius
Use the Smooth Radius slider to clean up the image before detection.
- A higher value smooths out minor textures and noise, preventing the tool from over-segmenting a single object into tiny fragments.
- A lower value retains fine details for detecting very small, distinct objects.
Step 3: Adjust the Min Distance Threshold
Move the Min Distance Threshold slider to define how far apart two points must be to be considered completely separate objects. Adjust this slider until the boundary lines perfectly snap between the objects you want to separate.
Step 4: Customize the Border Style
Choose a boundary line color that stands out against your image using the Color Preset dropdown or the color picker. You can also adjust the Thickness value to make the separation lines bold and clearly visible.
Step 5: Apply the Segmentation
Once the boundary lines outline your subjects exactly the way you want, click OK. Your image will be instantly updated with the precise, customized borders!
(Tip: If you ever get lost in the adjustments, simply click the Default button to reset the sliders to a balanced starting point.)
With the Watershed Segmentation tool, isolating, analyzing, and outlining merged objects is faster and more accurate than ever before!